
The Jungalow: Before & After Of Biggest Home Renovation Ever!

The newly renovated Jungalow Kitchen
Those of you who’ve followed me on Instagram for a while will have heard me go on and on (and on) about “The Jungalow” - our 18 month home renovation project that we finally finished this week!
I’m so excited to share all the before and afters with you but before we get to that, I thought it would be helpful to share the story of how we accidentally (on purpose) bought our future family home and how some very special people helped make it our own!
“Once I first stepped into the house, I had a gut feeling that it just felt good. I could imagine us living there and making it feel like ours. Even though we weren’t looking for a new property and didn’t have the means to make it happen, I knew we would somehow”

The Jungalow, West Bay Road, Grand Cayman
How It Came About
As you may already know, my husband Stefan is a real estate agent here in Cayman and so both personally and professionally, he has a passion for real estate (and turns out I do too!). There isn’t normally a week that goes by where we’re not talking about a new listing he’s seen or a new development that’s just launched. Dinner-time dreaming just comes with the territory!
So when he came home talking about a property he had just valued earlier that week, a major fixer-upper in a great location, I didn’t really react. We were happy where we were, with no need to look elsewhere. We had already completed a full-scale renovation on our first home and had recently moved into Vela, a new build that we reserved pre-construction 2 years prior. Why would I want to think about another project?! And how the heck could we afford one?!
Sometimes the best thing you can do is go with what feels right. So with a week to go before we headed off to Australia and Bali for a month, I thought I better go and see the property keeping Stefan talking.
“There’s no harm in taking a look, right?” I thought to myself.
Thank goodness I went, and thank goodness I took my camera (these were the only proper BEFORE photos we got!).
I had no idea that 6 months later, we’d be starting our most major renovation to date on this 47-year-old 4 bedroom family home that we’d fallen in love with.

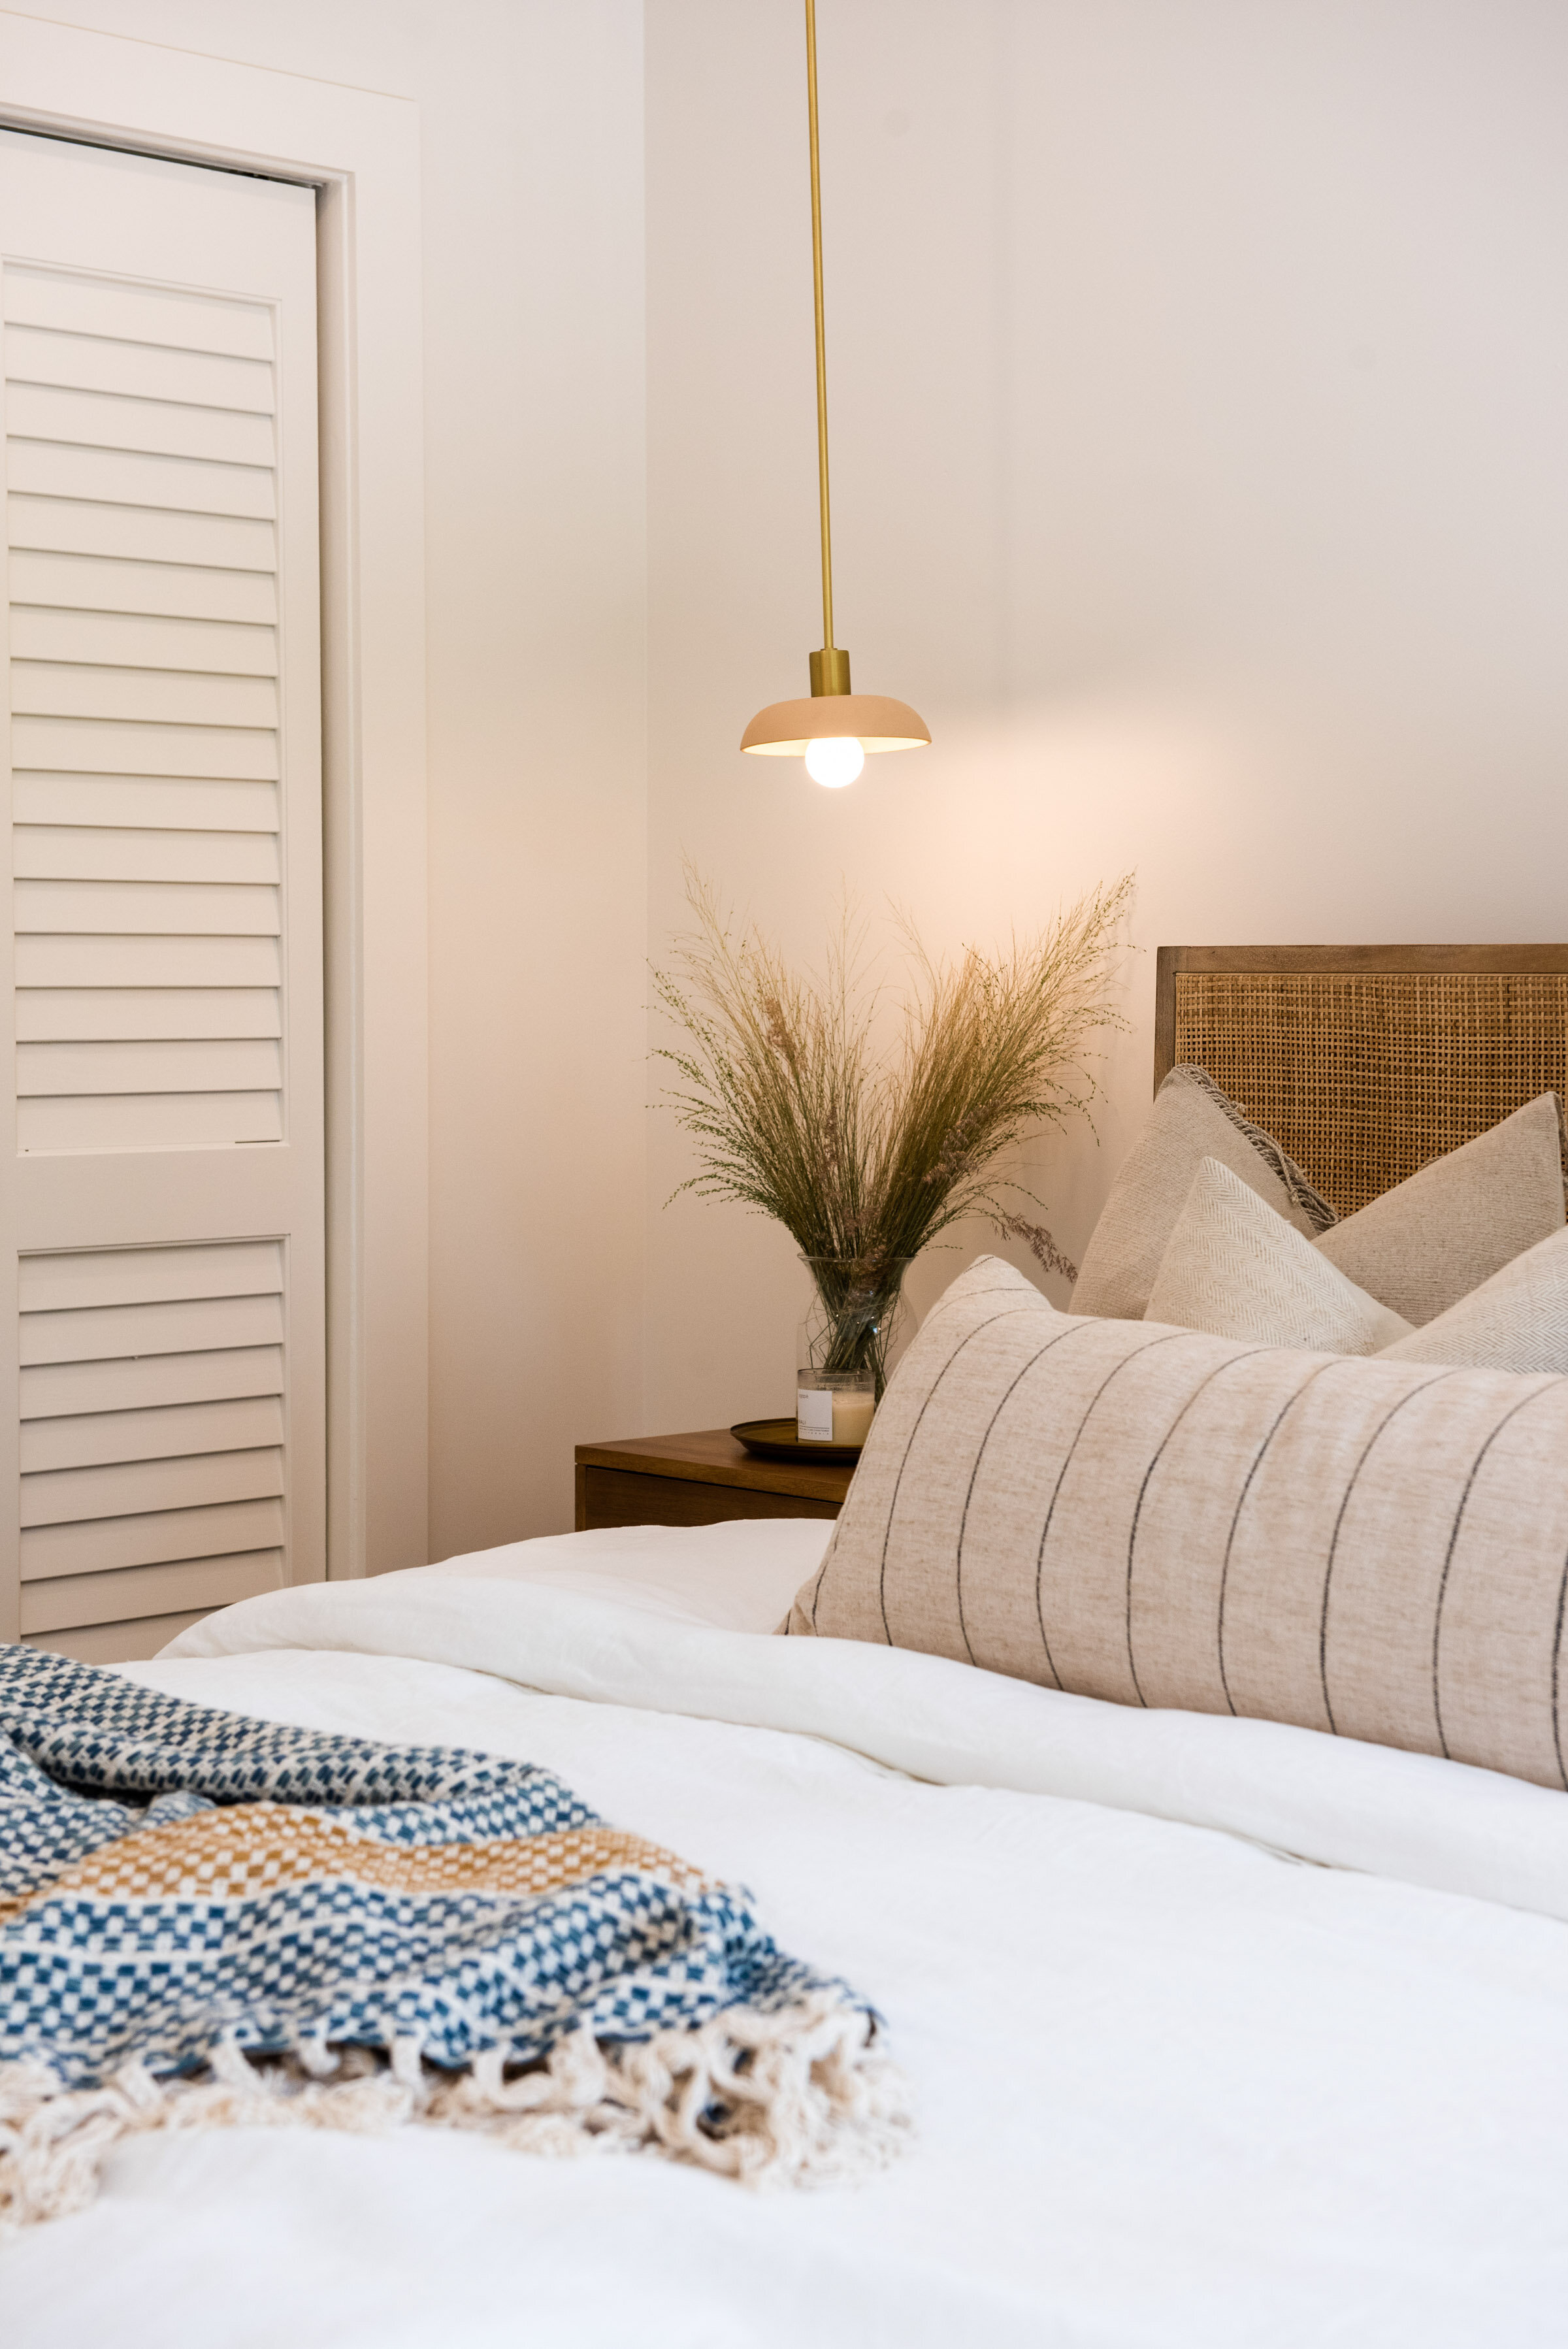
The newly renovated Jungalow Master Bedroom
Our Reno Team
If it takes a village to raise a child, I can confirm it takes an army to totally renovate a house!
It’s hard to know where to start to take you through the journey we’ve been on over the past year and a half. It’s even harder to try and thank all the key players who have helped us along the way. For those who want to take on a similar project in Cayman, I’ve included a list of our dream team at the bottom of this blog and I’d highly recommend them all.
Although every person played an integral part in this process, as someone who lives for interiors, I feel like we really couldn’t have gotten these results without the help of our incredible friend and oh-so-talented interior designer, Cynthia Tranel (and her hubby Jordan Tranel) of Label C Designs.
I’d really like to dedicate this blog to Cynthia.

l-r: Sophie Prior, Cynthia Tranel & Stefan Prior at The Jungalow
The Importance of Hiring An Expert
Despite joining our project a third of the way through, Cynthia has truly made her beautiful mark on this home and undoubtedly brought our vision to life better than we could have ever imagined.
Our initial goal for this property was to reconfigure the use of space to expand the kitchen, add a dining room, and add one more bedroom by reducing the size of the Mini-Jungalow. These changes alongside modernising the house would maximise its potential and hopefully create a popular AirBnB rental for us until we needed the space.
Given the need to keep on budget and the fact we’d done a renovation before (albeit a LOT smaller) we thought we could do it ourselves (!) and push ahead without a designer. After buying some helpful design hours to get us moving (always a good idea!) we quickly realised we were going to need more major help.
Once we understood the scale of the project and the challenge of achieving the look we wanted on the budget we had, it was obvious we needed an interior designer and we knew Cynthia was the one.
Cynthia’s ability to fully grasp the vision we had (Malibu Surfrider meets Byron Bay Boho Chic) and bring it to life remotely, whilst staying on budget, and working through a pandemic to get all the items here in one piece has been truly incredible.
The icing on the cake was her styling and detailing to bring it all together and make this home really shine. You’ll have seen from our reveal video just how overwhelming that moment was for us and it really was the most amazing gift to be surprised by the final finished project we’d been dreaming of for so long.
The Jungalow Mood Boards by Label C Designs


The Before & Afters
So now you have the back story, I’m excited to share a room by room tour of The Jungalow and those before and after photos!
The bit you’ve all been waiting for and of course all our sources with direct links for your shopping pleasure. All furniture, bedding, and accessories were sourced and styled by Label C Designs. This blog is in collaboration with Label C Designs and although the services were discounted in exchange, the items were happily paid for by us in full.
We’ve been really thrilled by the end result and I hope you enjoy my room by room home tour below!
The Exterior & Garden
New windows, exterior cladding and lots of white paint really transformed the exterior. We also decided to keep the existing wooden door and had that refurbished and brought back to life which adds so much character to the home. We managed to almost kill off the grass but with some new irrigation and lots of love, the gardens are coming back to life - and now with some new additions like the Australian-inspired screw-pine tree and sand garden!

Upgrades: New Hurricane-impact Low E windows (Caribbean Impact), exterior cladding, painting (Simply White), landscaping (Earthworks)
The Entranceway
Making a functional but stylish entranceway was really important to us and Cynthia helped us do just that. Firstly, by changing the wall that the dresser previously sat on and reconfiguring the swing of the door. These simple design changes allowed us to make better use of the space. With a storage closet opposite the door (out of shot) we knew we had space to hide the mess, so we wanted something warm and inviting and absolutely loved this rustic entranceway table Cynthia sourced. With a busy household, the wooden towel/schoolbag/handbag rack adds function and style which was an important part of our brief. Lastly, the door - for some reason we almost swayed to swap out the old door for a new more Hurricane-proof door but I’m so glad we didn’t! With lots of love and attention, John Bird and his team at Marlet Design were able to bring our 47-year-old door back to life and create a beautiful glass side panel and wood to match.
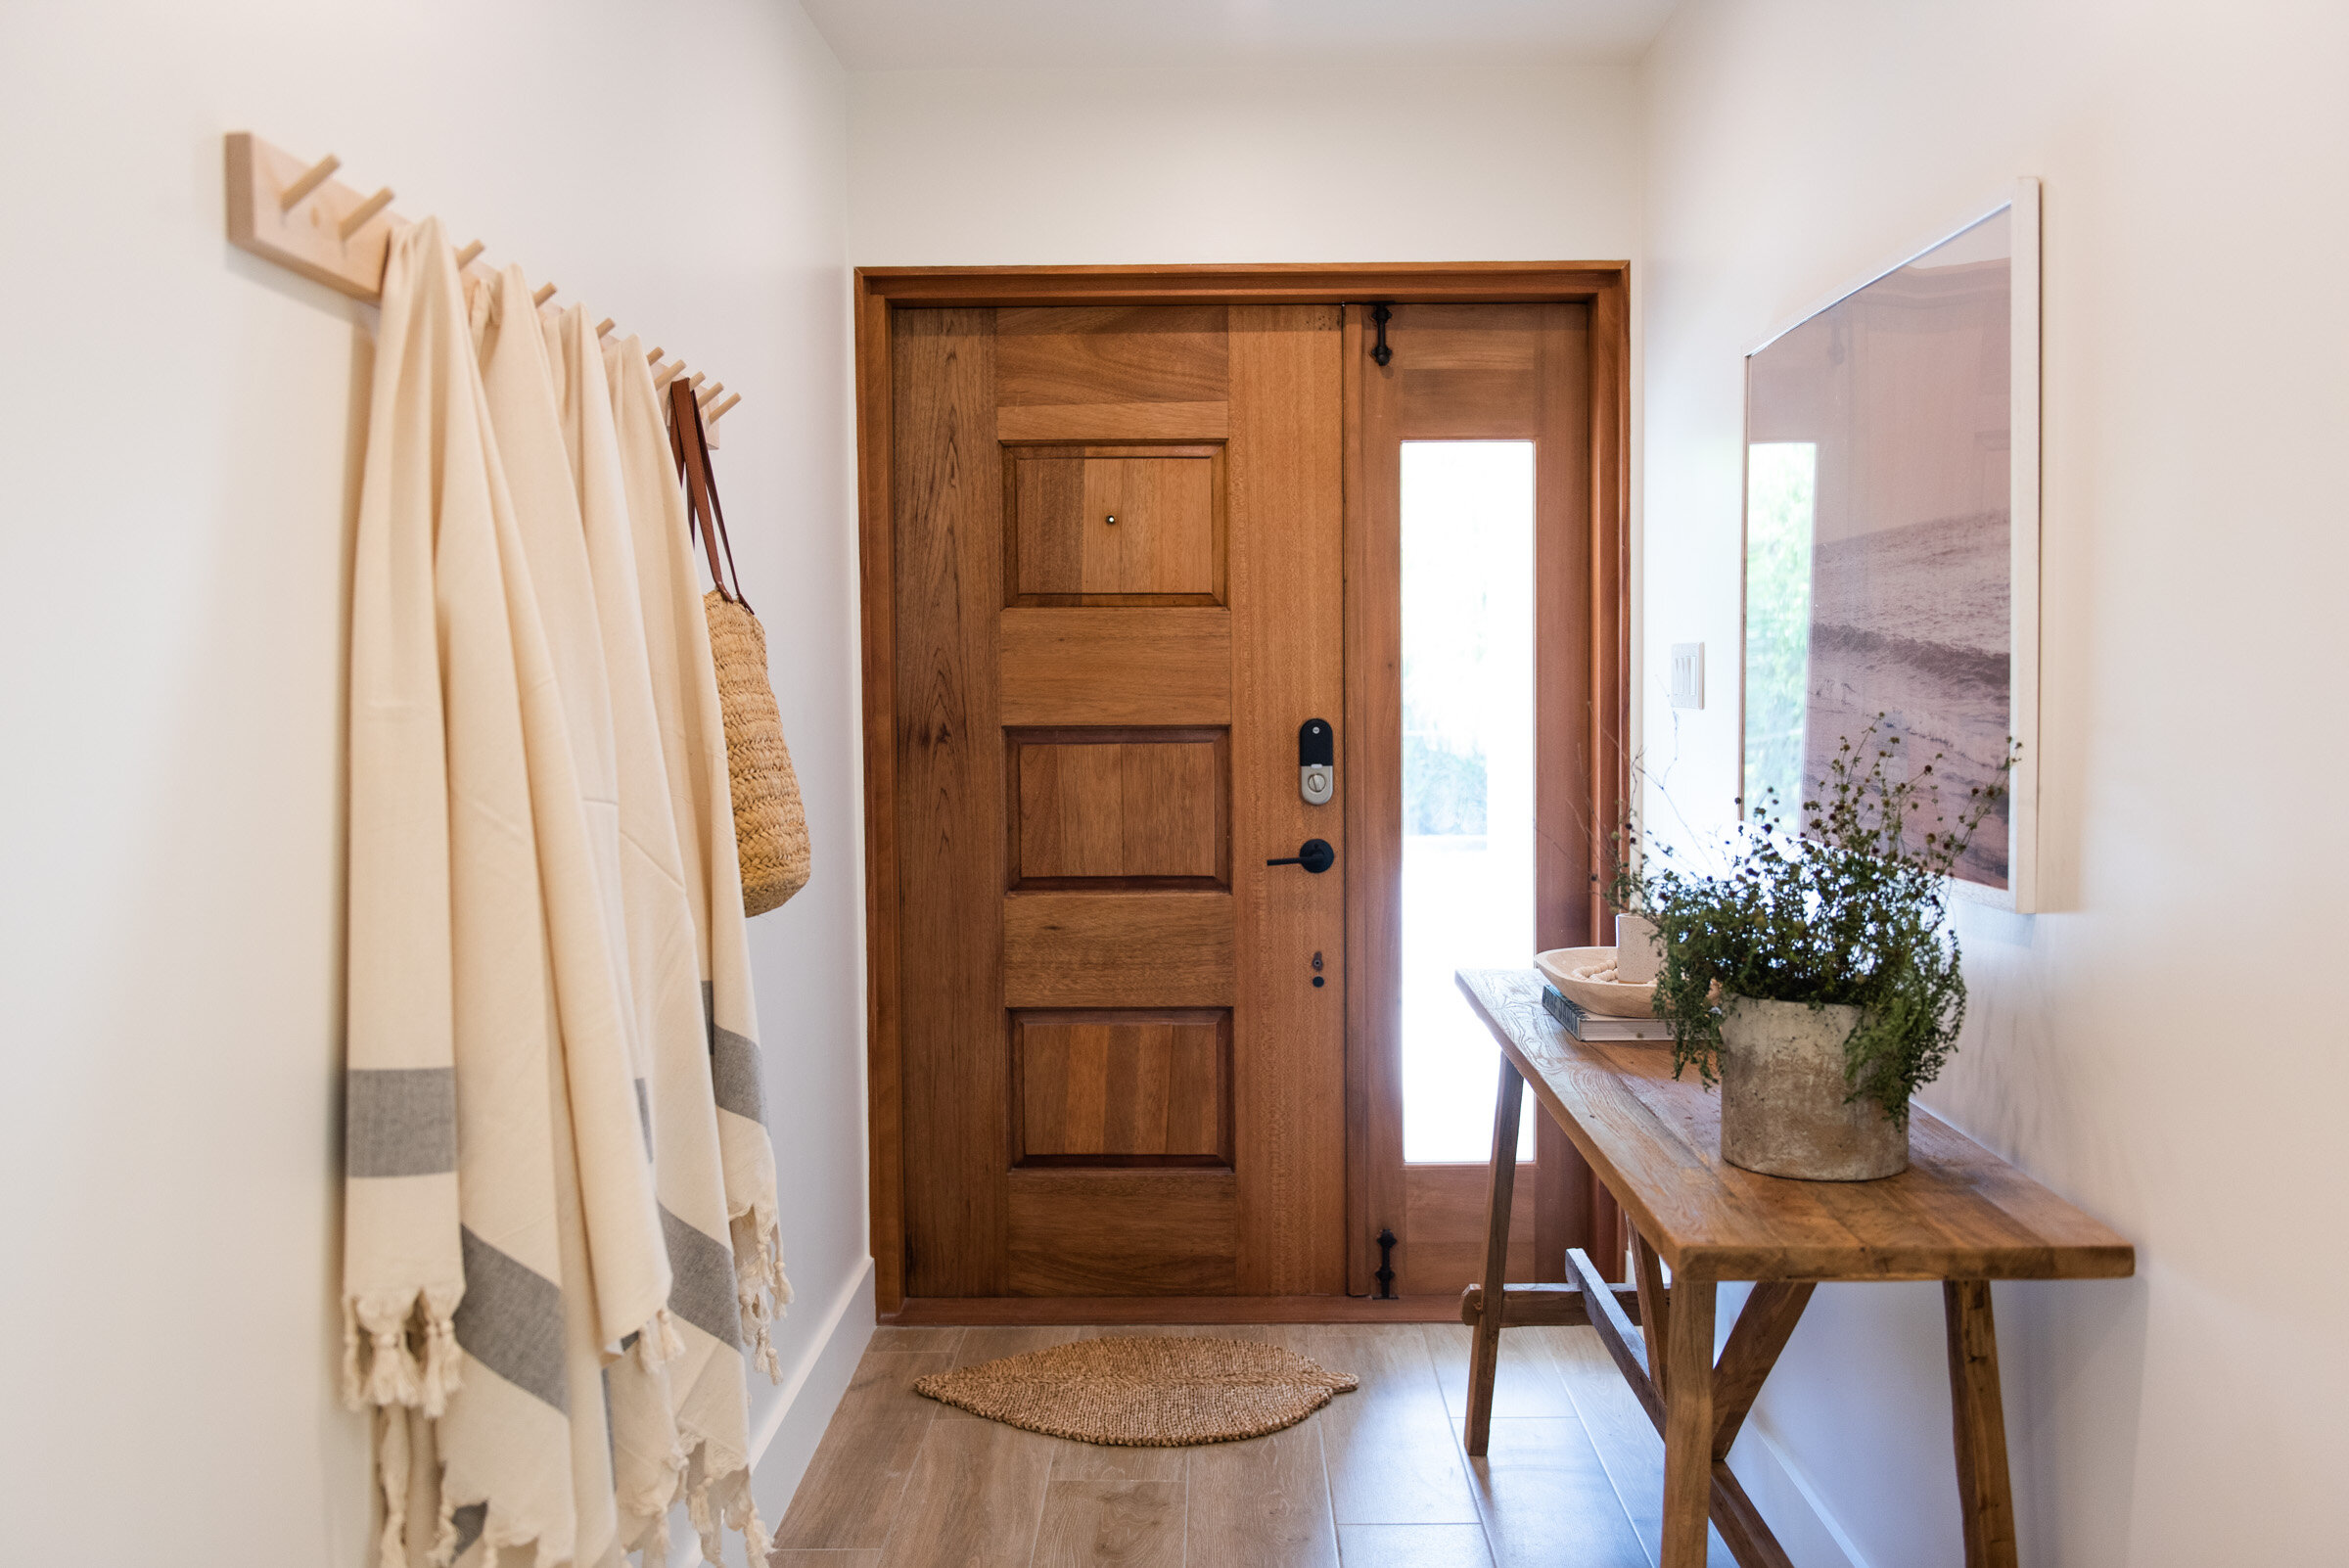
Items (all sourced, delivered and installed by Label C): Entranceway Table // Turkish Beach Towels // Rack with Hooks // Planter (similar here) // Decorative Tray
The Media Room & Living Room
The vaulted ceiling in the living area was what made us fall in love with this home. Sadly without any insulation to keep the cold AC in, we had to add insulation over it but decided to splash out and recreate the cladding ceiling as it adds so much character to the home.
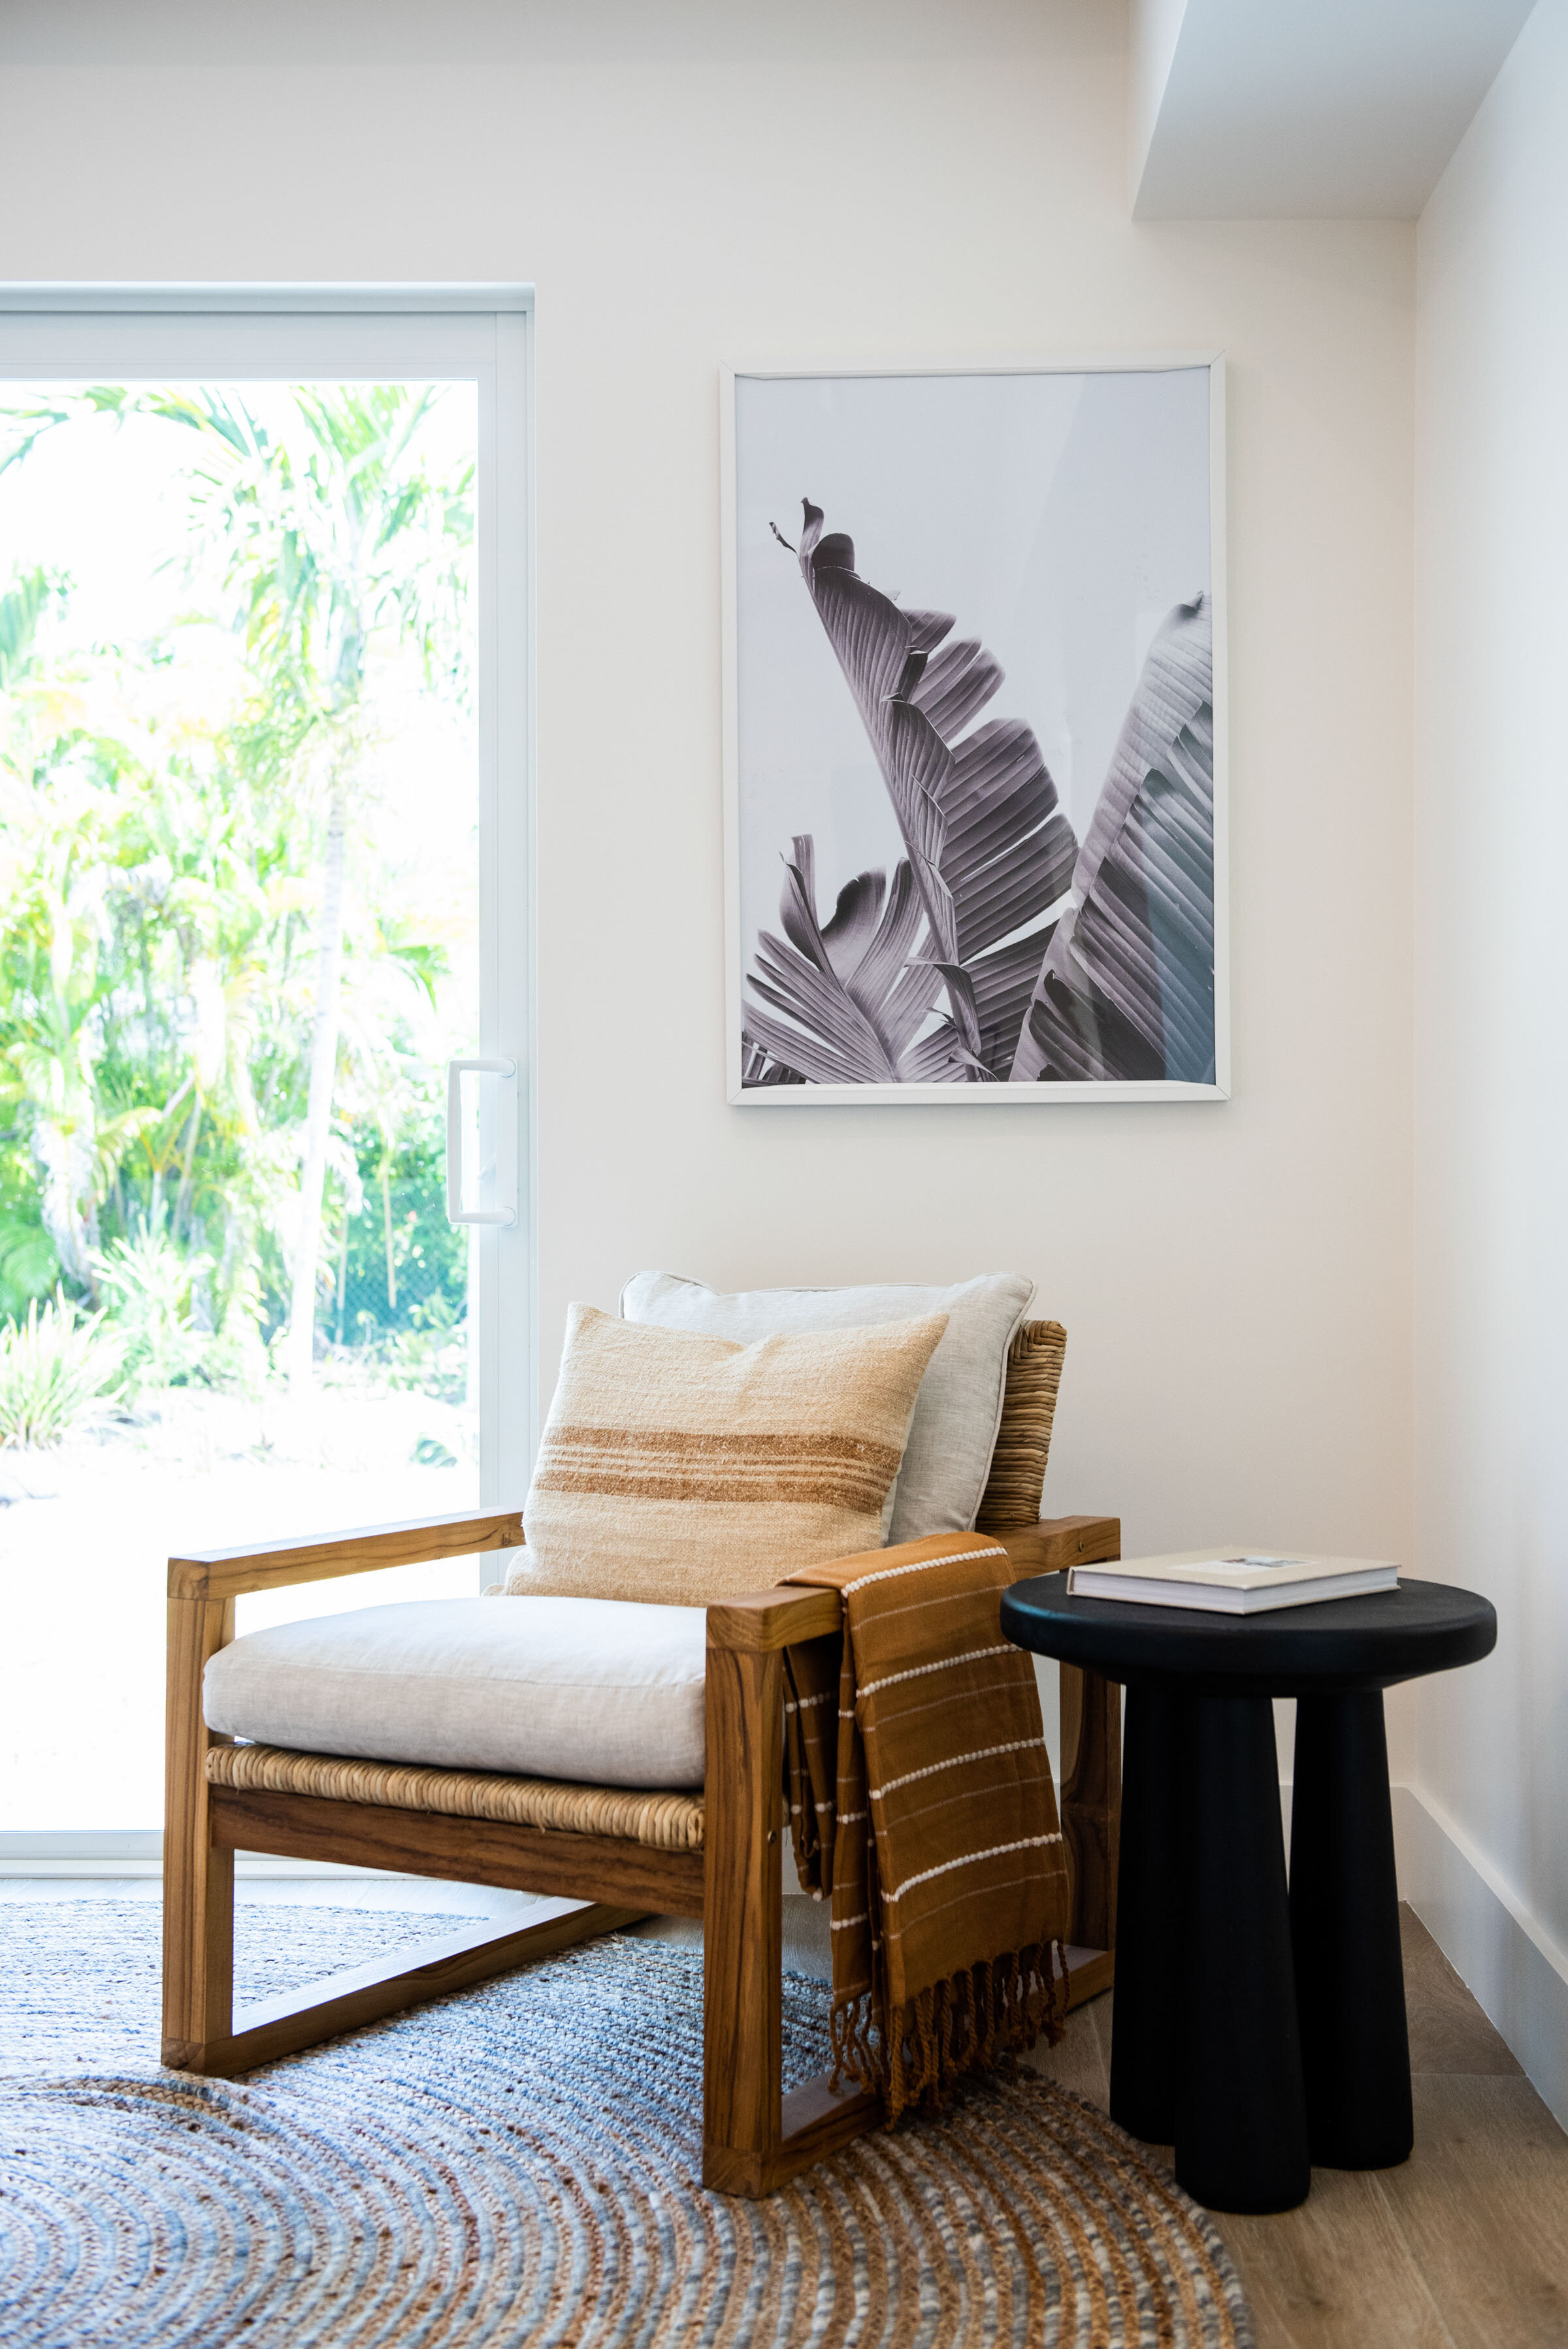
With Cynthia’s expert advice we decided to split up the living room to have one side as the media (TV) side and the other as a reading or post-dinner entertaining space. With her beautifully curated furniture collections, we were able to have two separate but connected seating areas, all in the same space.


Items (all sourced, delivered and installed by Label C unless otherwise specified): 5 Seater Sectional Sofa // Seagrass Rope Coffee Table // Asian Vintage Stools // Rattan Style Media Console // Surfboard (second-hand via Ecay Trade) // IKEA Ribba Frames in White // Artwork (Poster Club & Etsy curated by Label C) // Vintage Cushions

Items (all sourced, delivered and installed by Label C unless otherwise specified): Jute Area Rug // Living Room Sofa // Vintage Wooden Coffee Table // Dark Green Accent Chairs (via Label C) // Floor Lamp // Cotton “All The Stripes” Throw Blanket // White Ribba Frames from IKEA // Artwork (Poster Club & Etsy curated by Label C)
The Kitchen
As the house was built so long ago (47 years to be exact), the kitchen was quite small for a modern, family kitchen so by removing a wall of cabinets we were able to open up the kitchen completely (doubling it in size). It might be my favourite renovation upgrade as it really made all the difference.
Luckily we had started working with Cynthia just as we were configuring the kitchen and she (and Jordan) were there to help us get the correctly proportioned kitchen island, decide whether to keep the beams exposed and whether or not to do track lighting or pendants.
Working with an interior designer to help guide you through these decisions really is invaluable! There’s a reason they’re experts at what they do and it’s well worth seeking their advice.

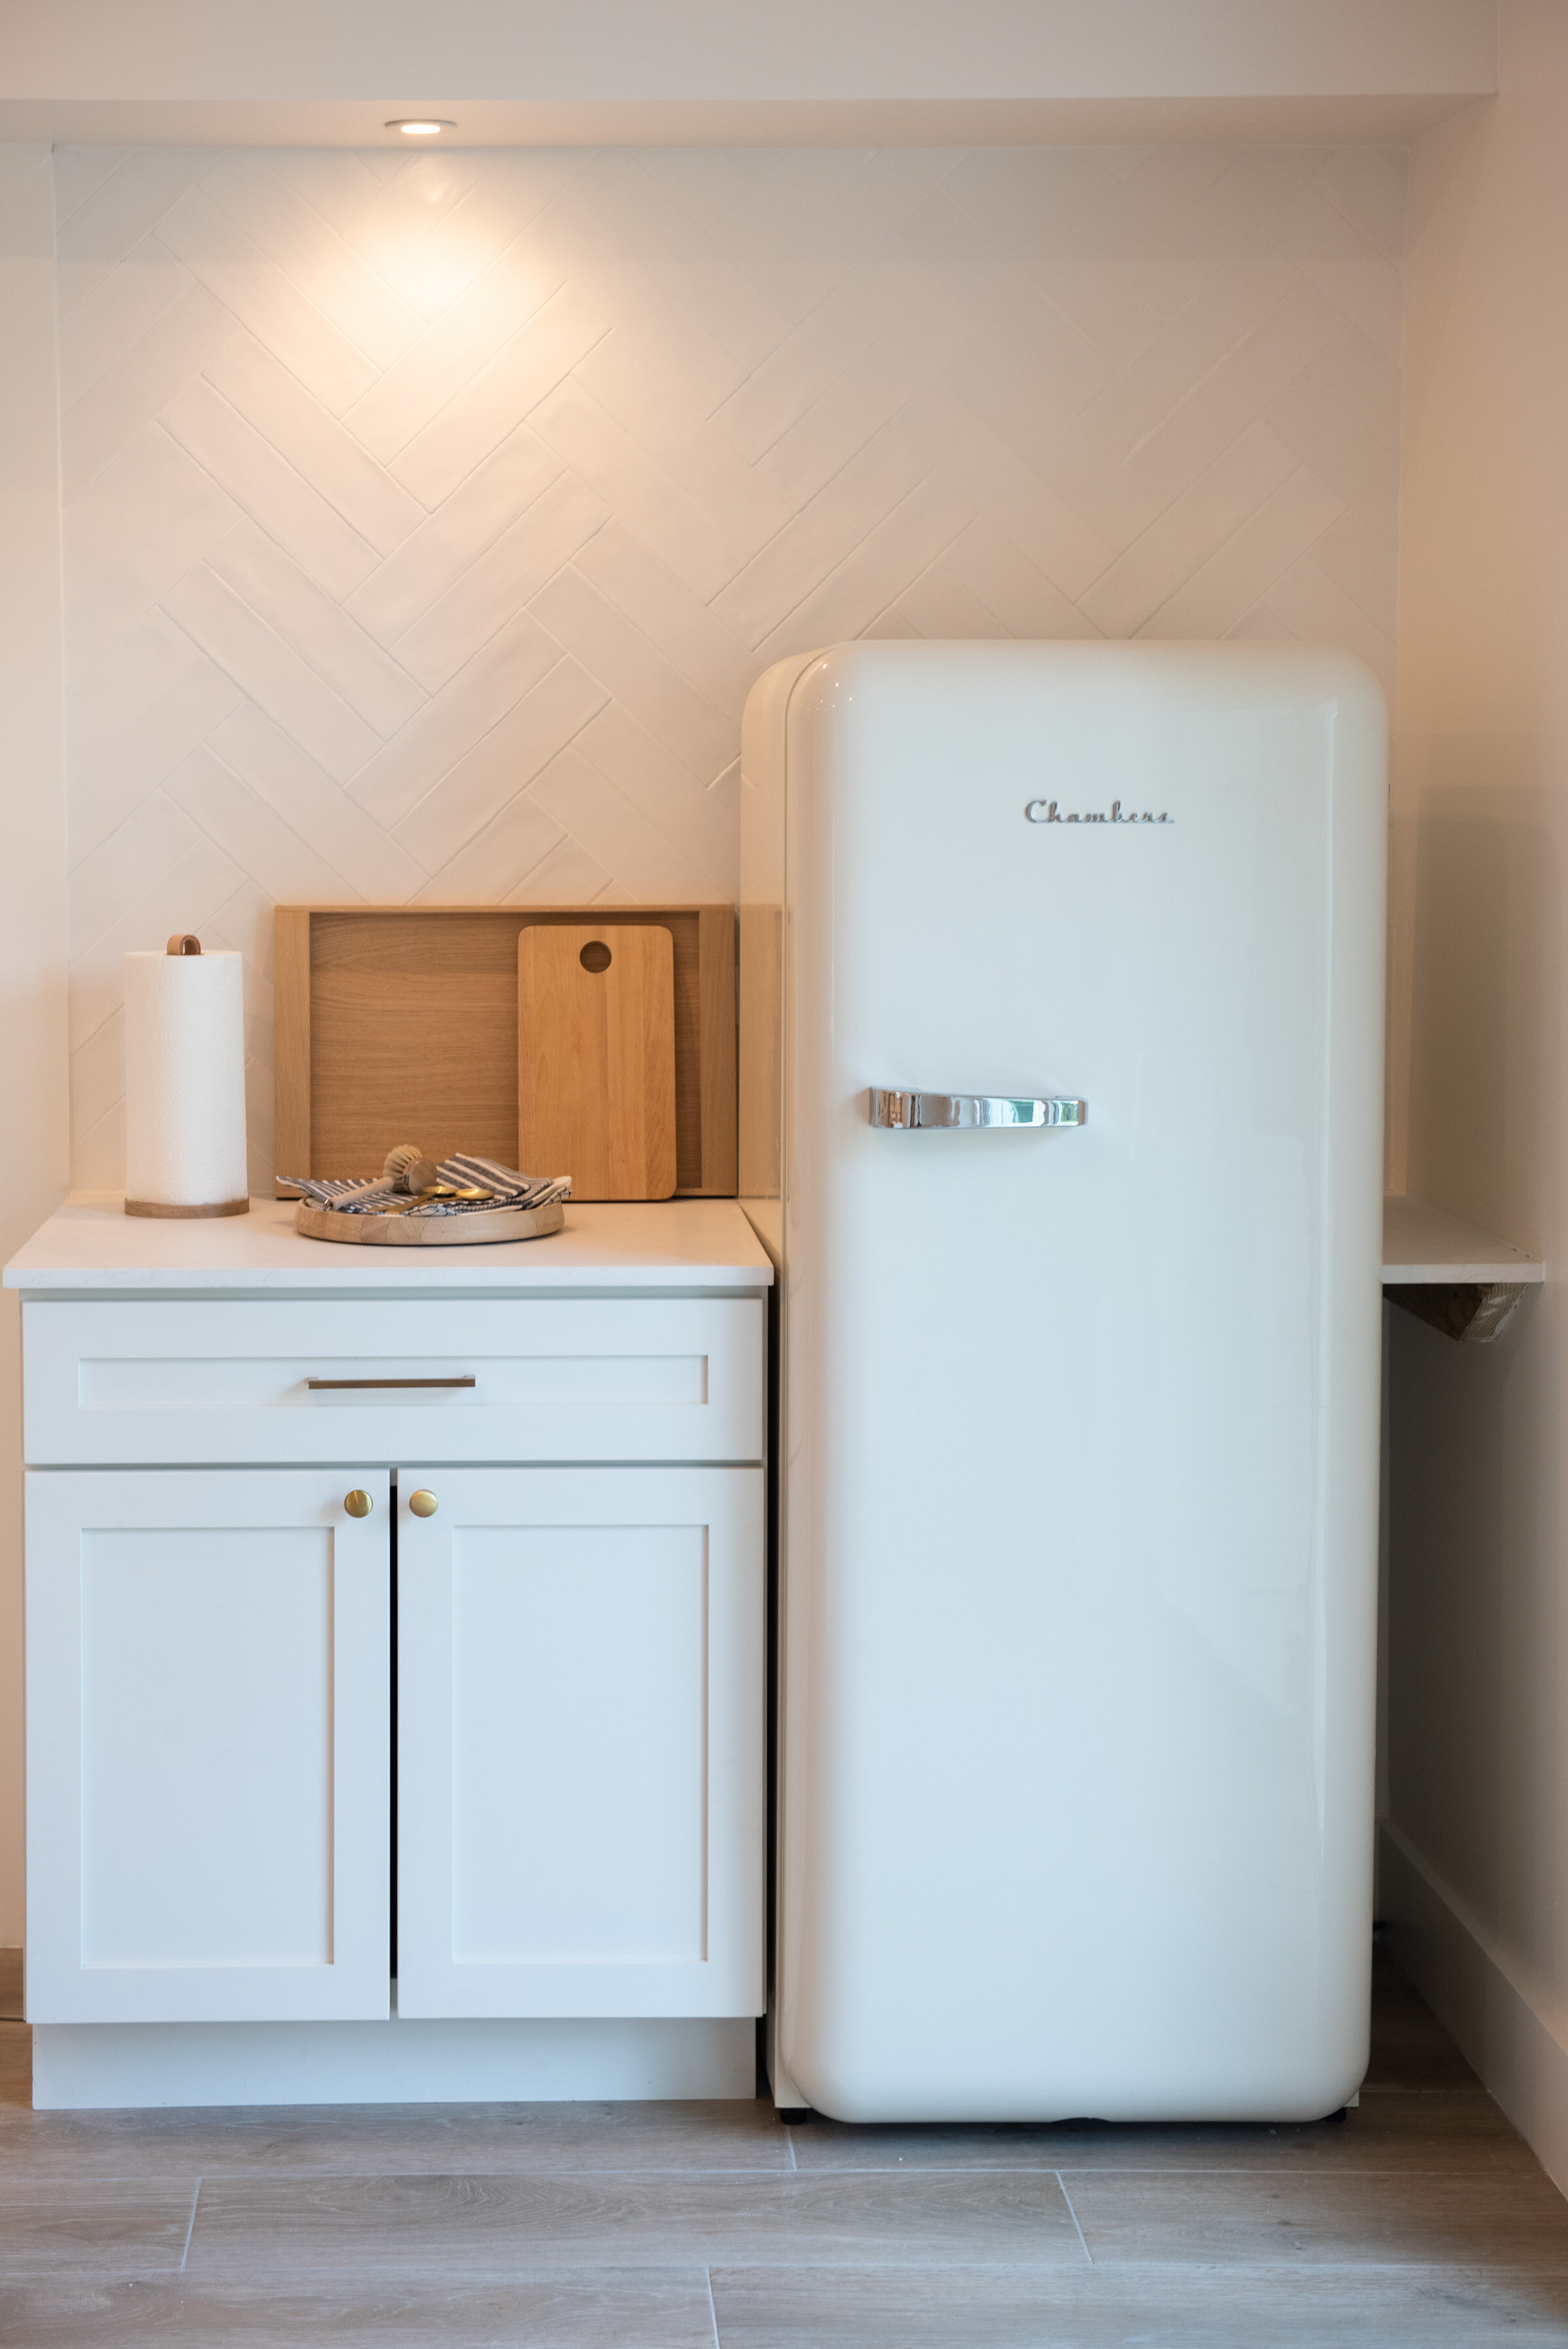
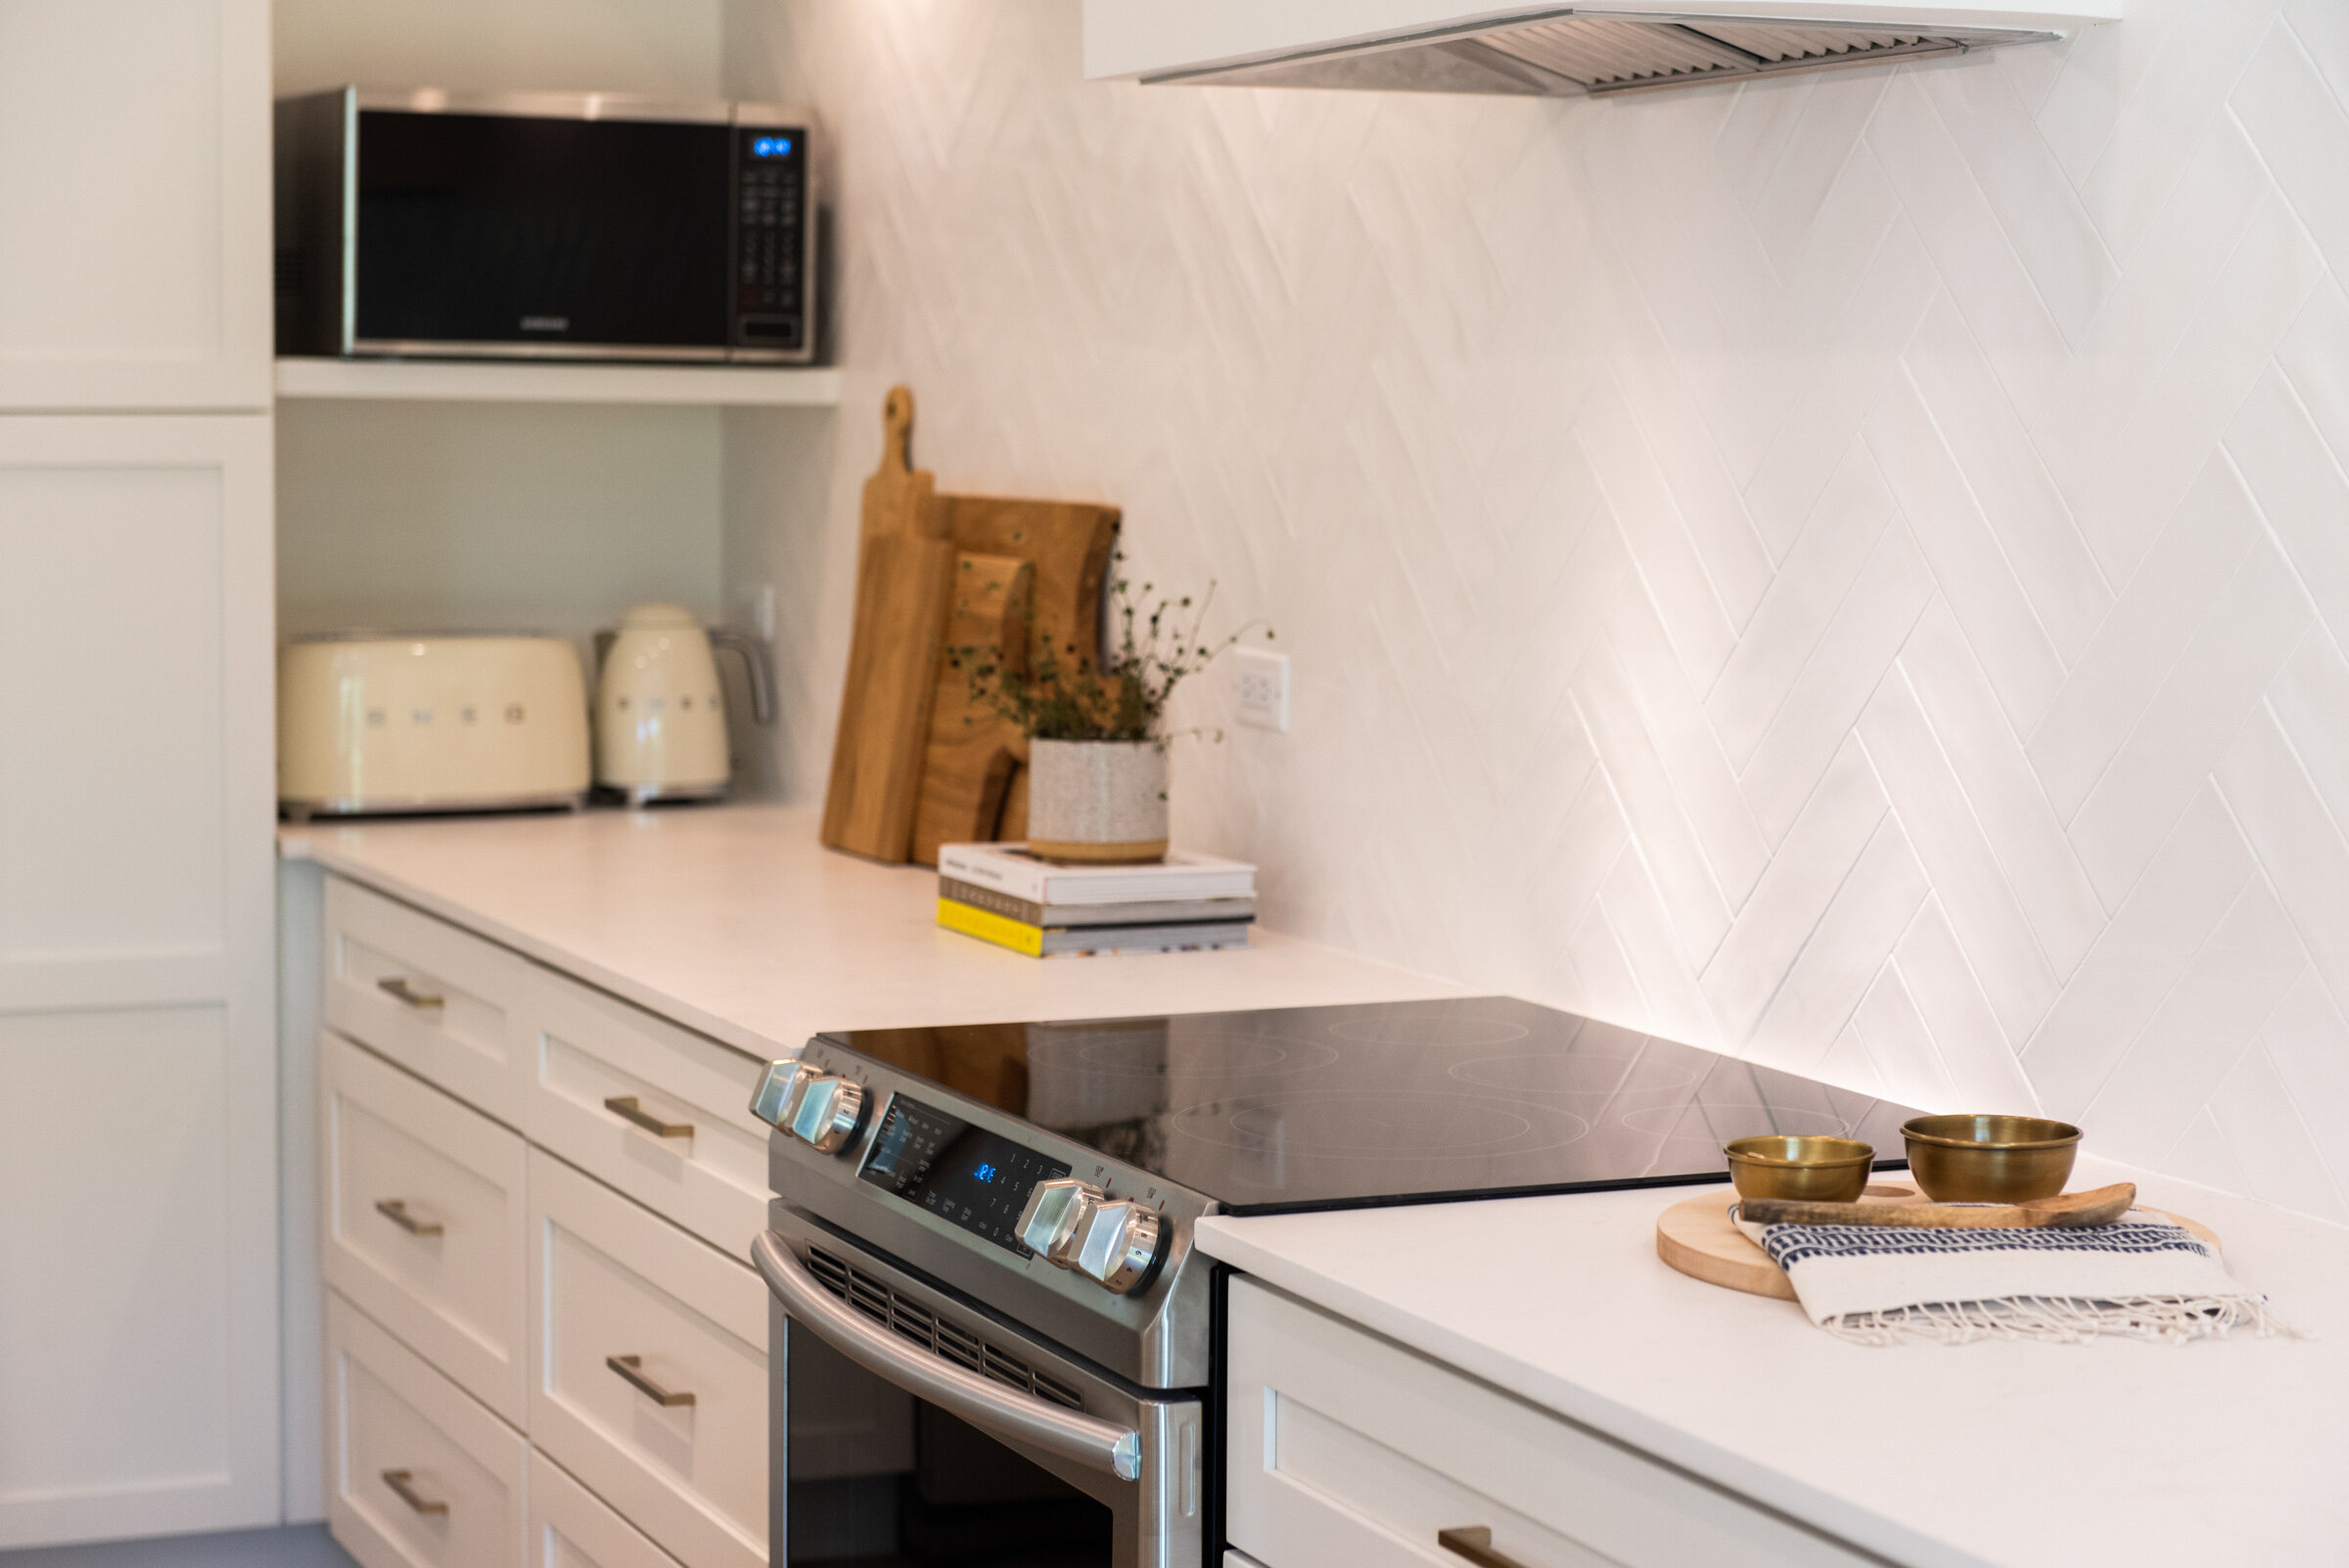
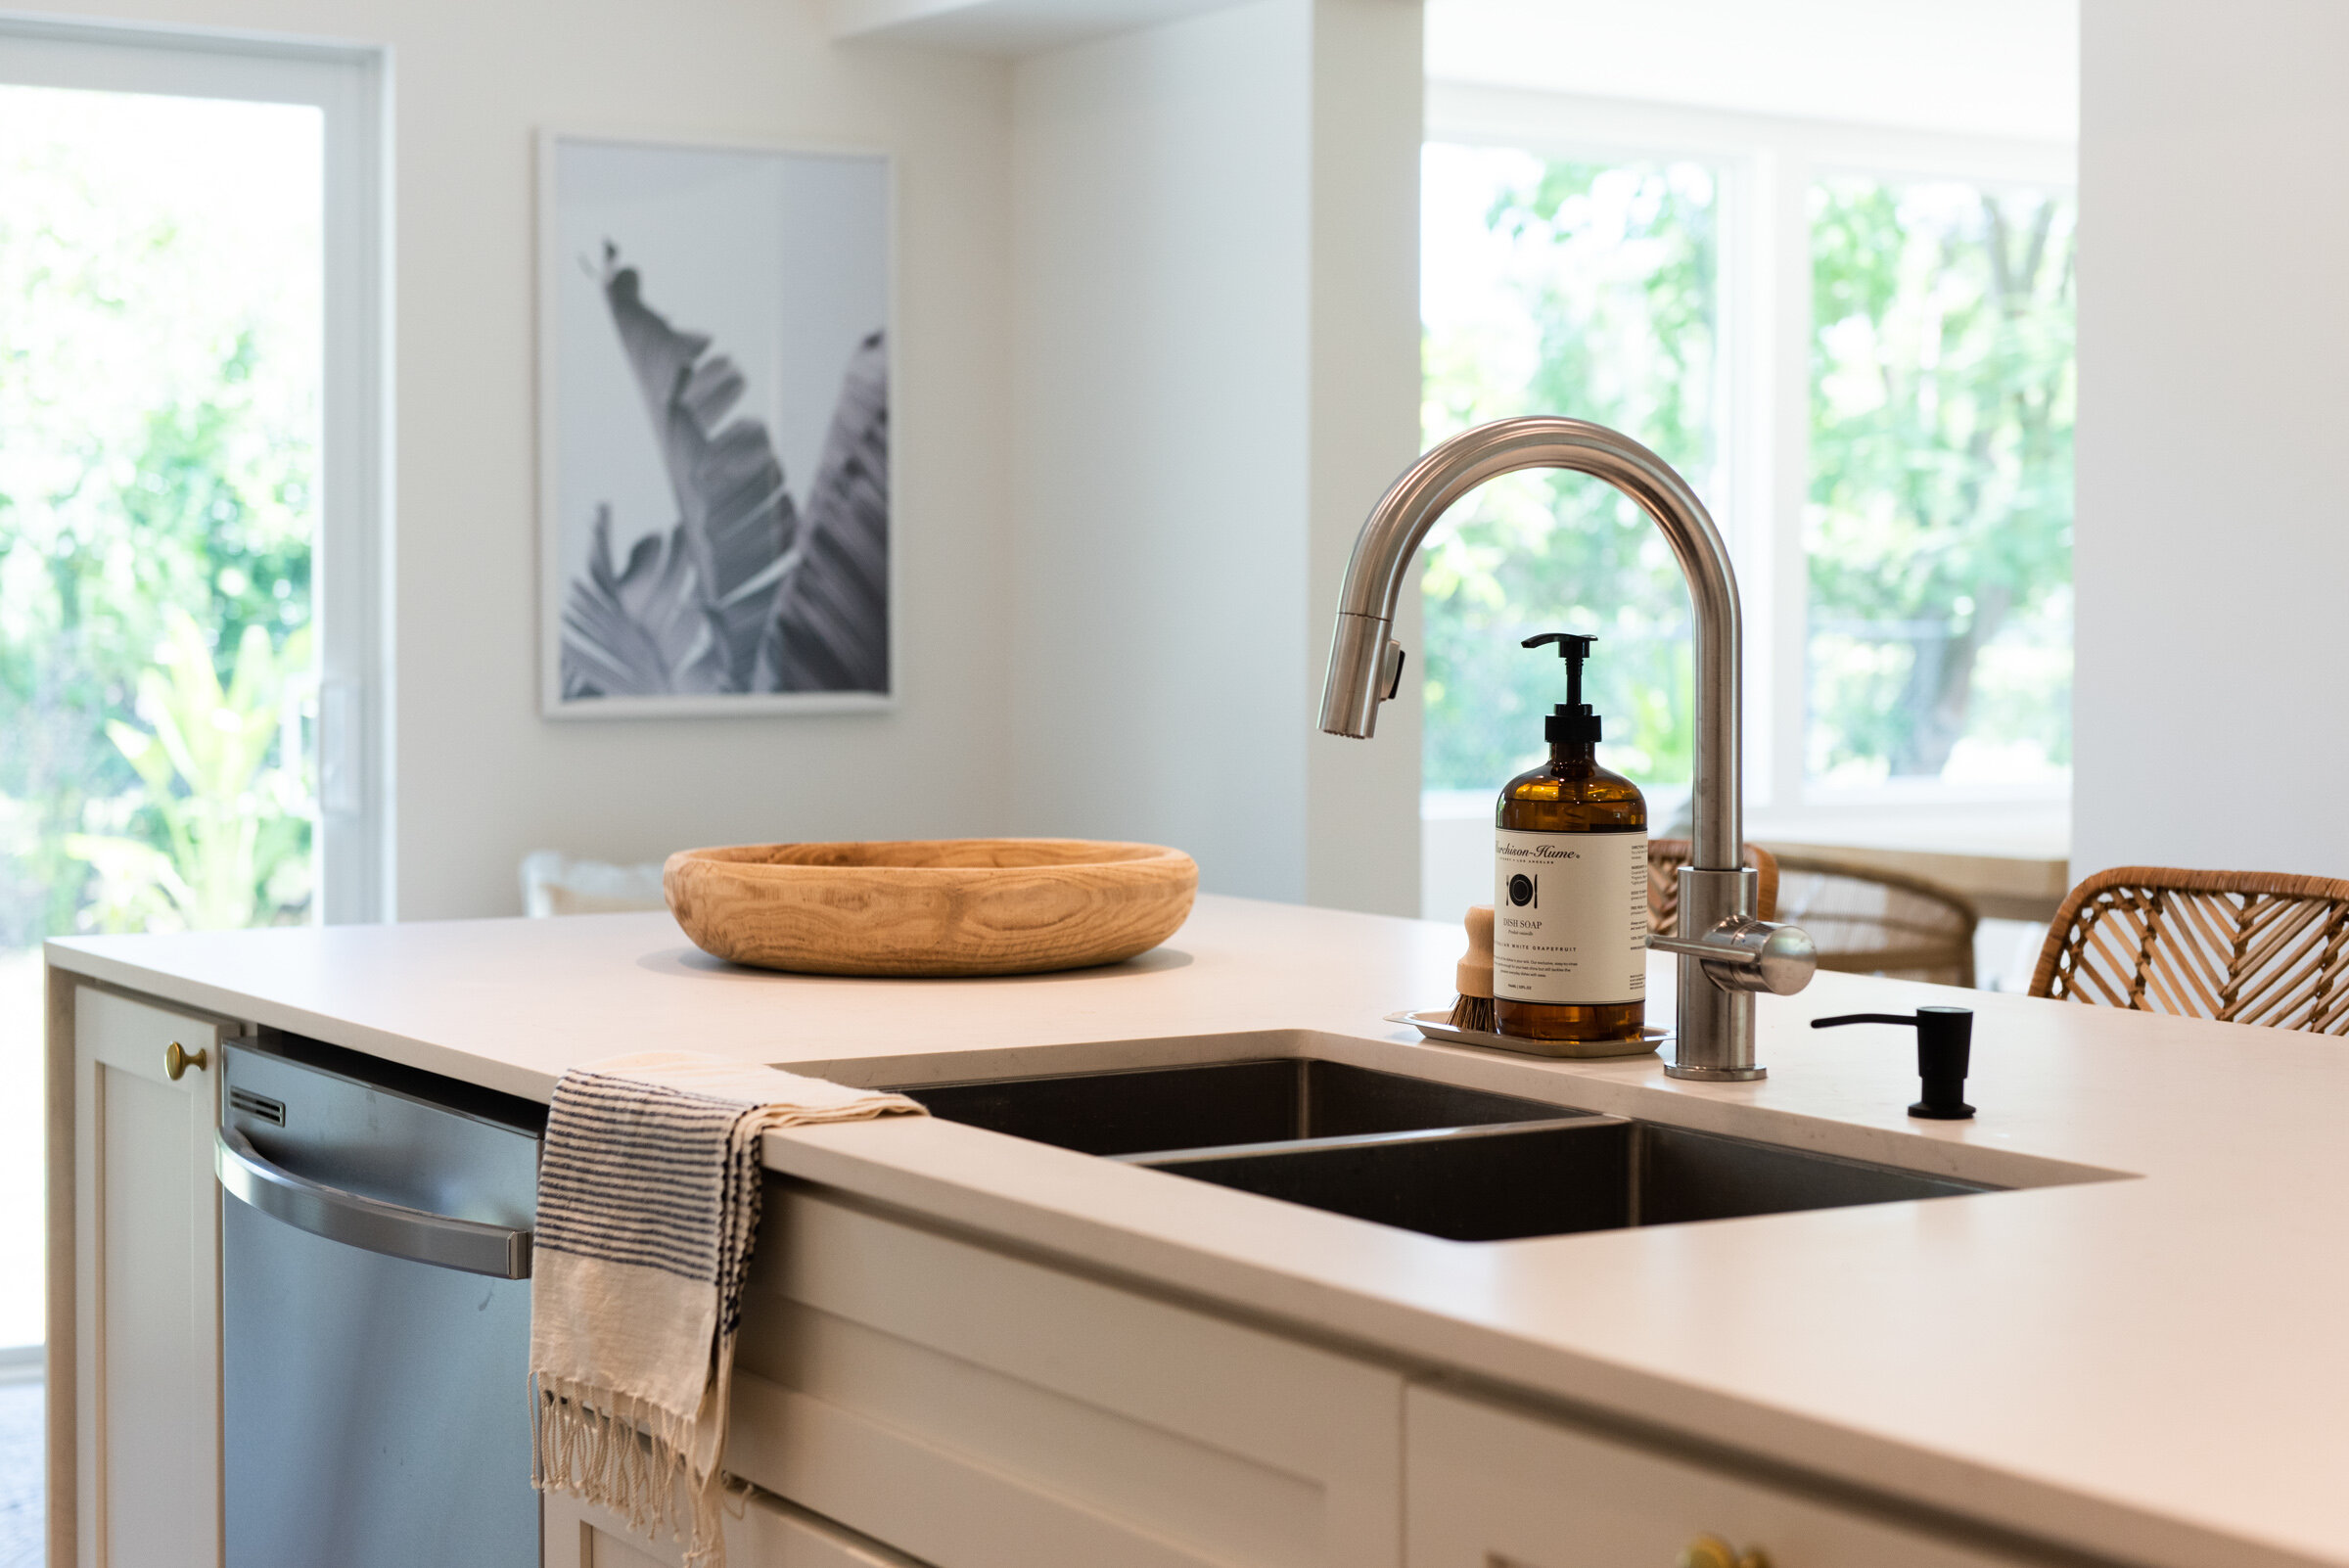
Items (all sourced, delivered and installed by Label C unless otherwise specified): Shaker-style Kitchen Cabinets (Living.ky) // Frosty Carrera Honed Quartz Countertop (ITC) // Brushed Gold Drawer Pulls (Wayfair) // Brushed Gold Mushroom Cabinet Knobs (Wayfair) // Natural Wicker Counter stools (Label C) // Chrome Kitchen Faucet (Wayfair) // White Subway Tile Backsplash (laid in double herringbone) (Wayfair) // LG Fridge (Home Depot), Electric slide-in cooker (Home Depot) // Vintage Smeg-style fridge (Wayfair) // 4 piece Smeg Toaster (Wayfair) // Smeg Electric Kettle (Wayfair) // Armchair (Label C) // Kitchen Accessories (Label C) // Vintage Pillows (Label C) // Books (Label C).
The Dining Room
The dining room in the original floorplan was located outside the kitchen and the space below was a sort of formal day room. Once we saw the space, we knew it would make the perfect dining room. The lower ceiling wouldn’t matter when you were sitting down and Cynthia ensured we could fit a 10 seater dining table in this space - crucial for future entertainers like us in this 5 bedroom family home. One of the sweetest little add-ons is this bar cart - a definite favourite of mine and the perfect way to jazz up your dinner parties!

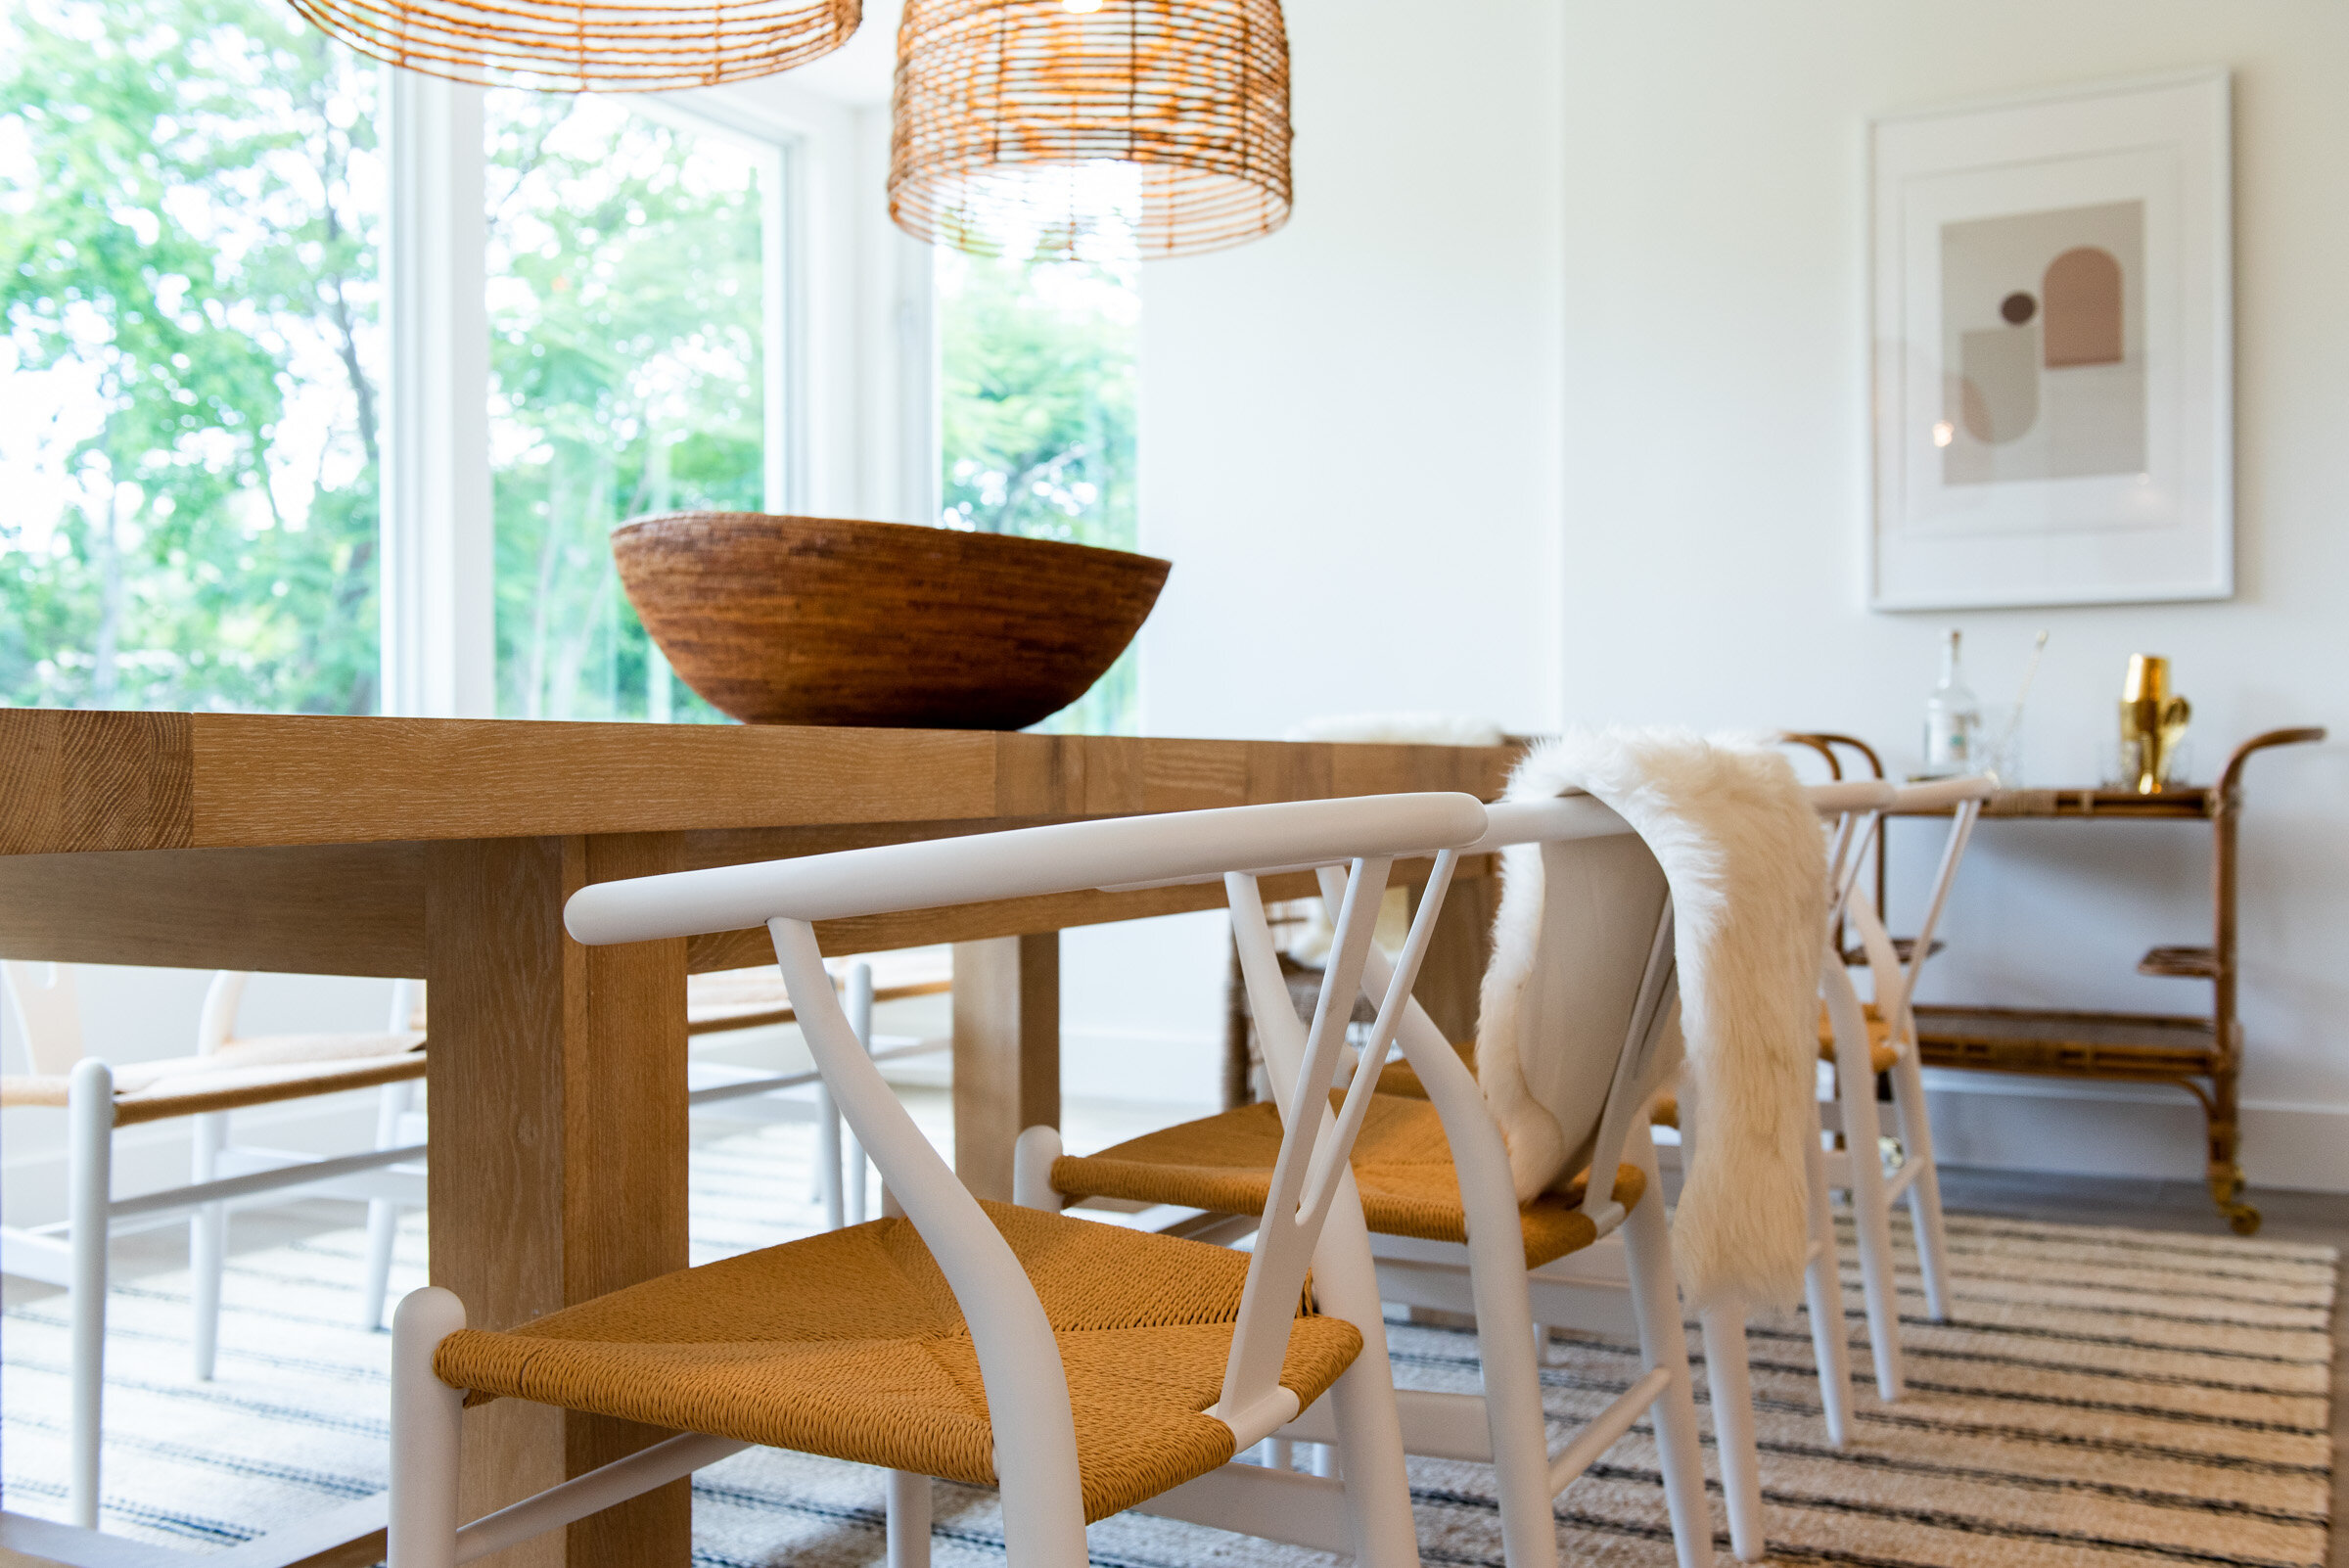
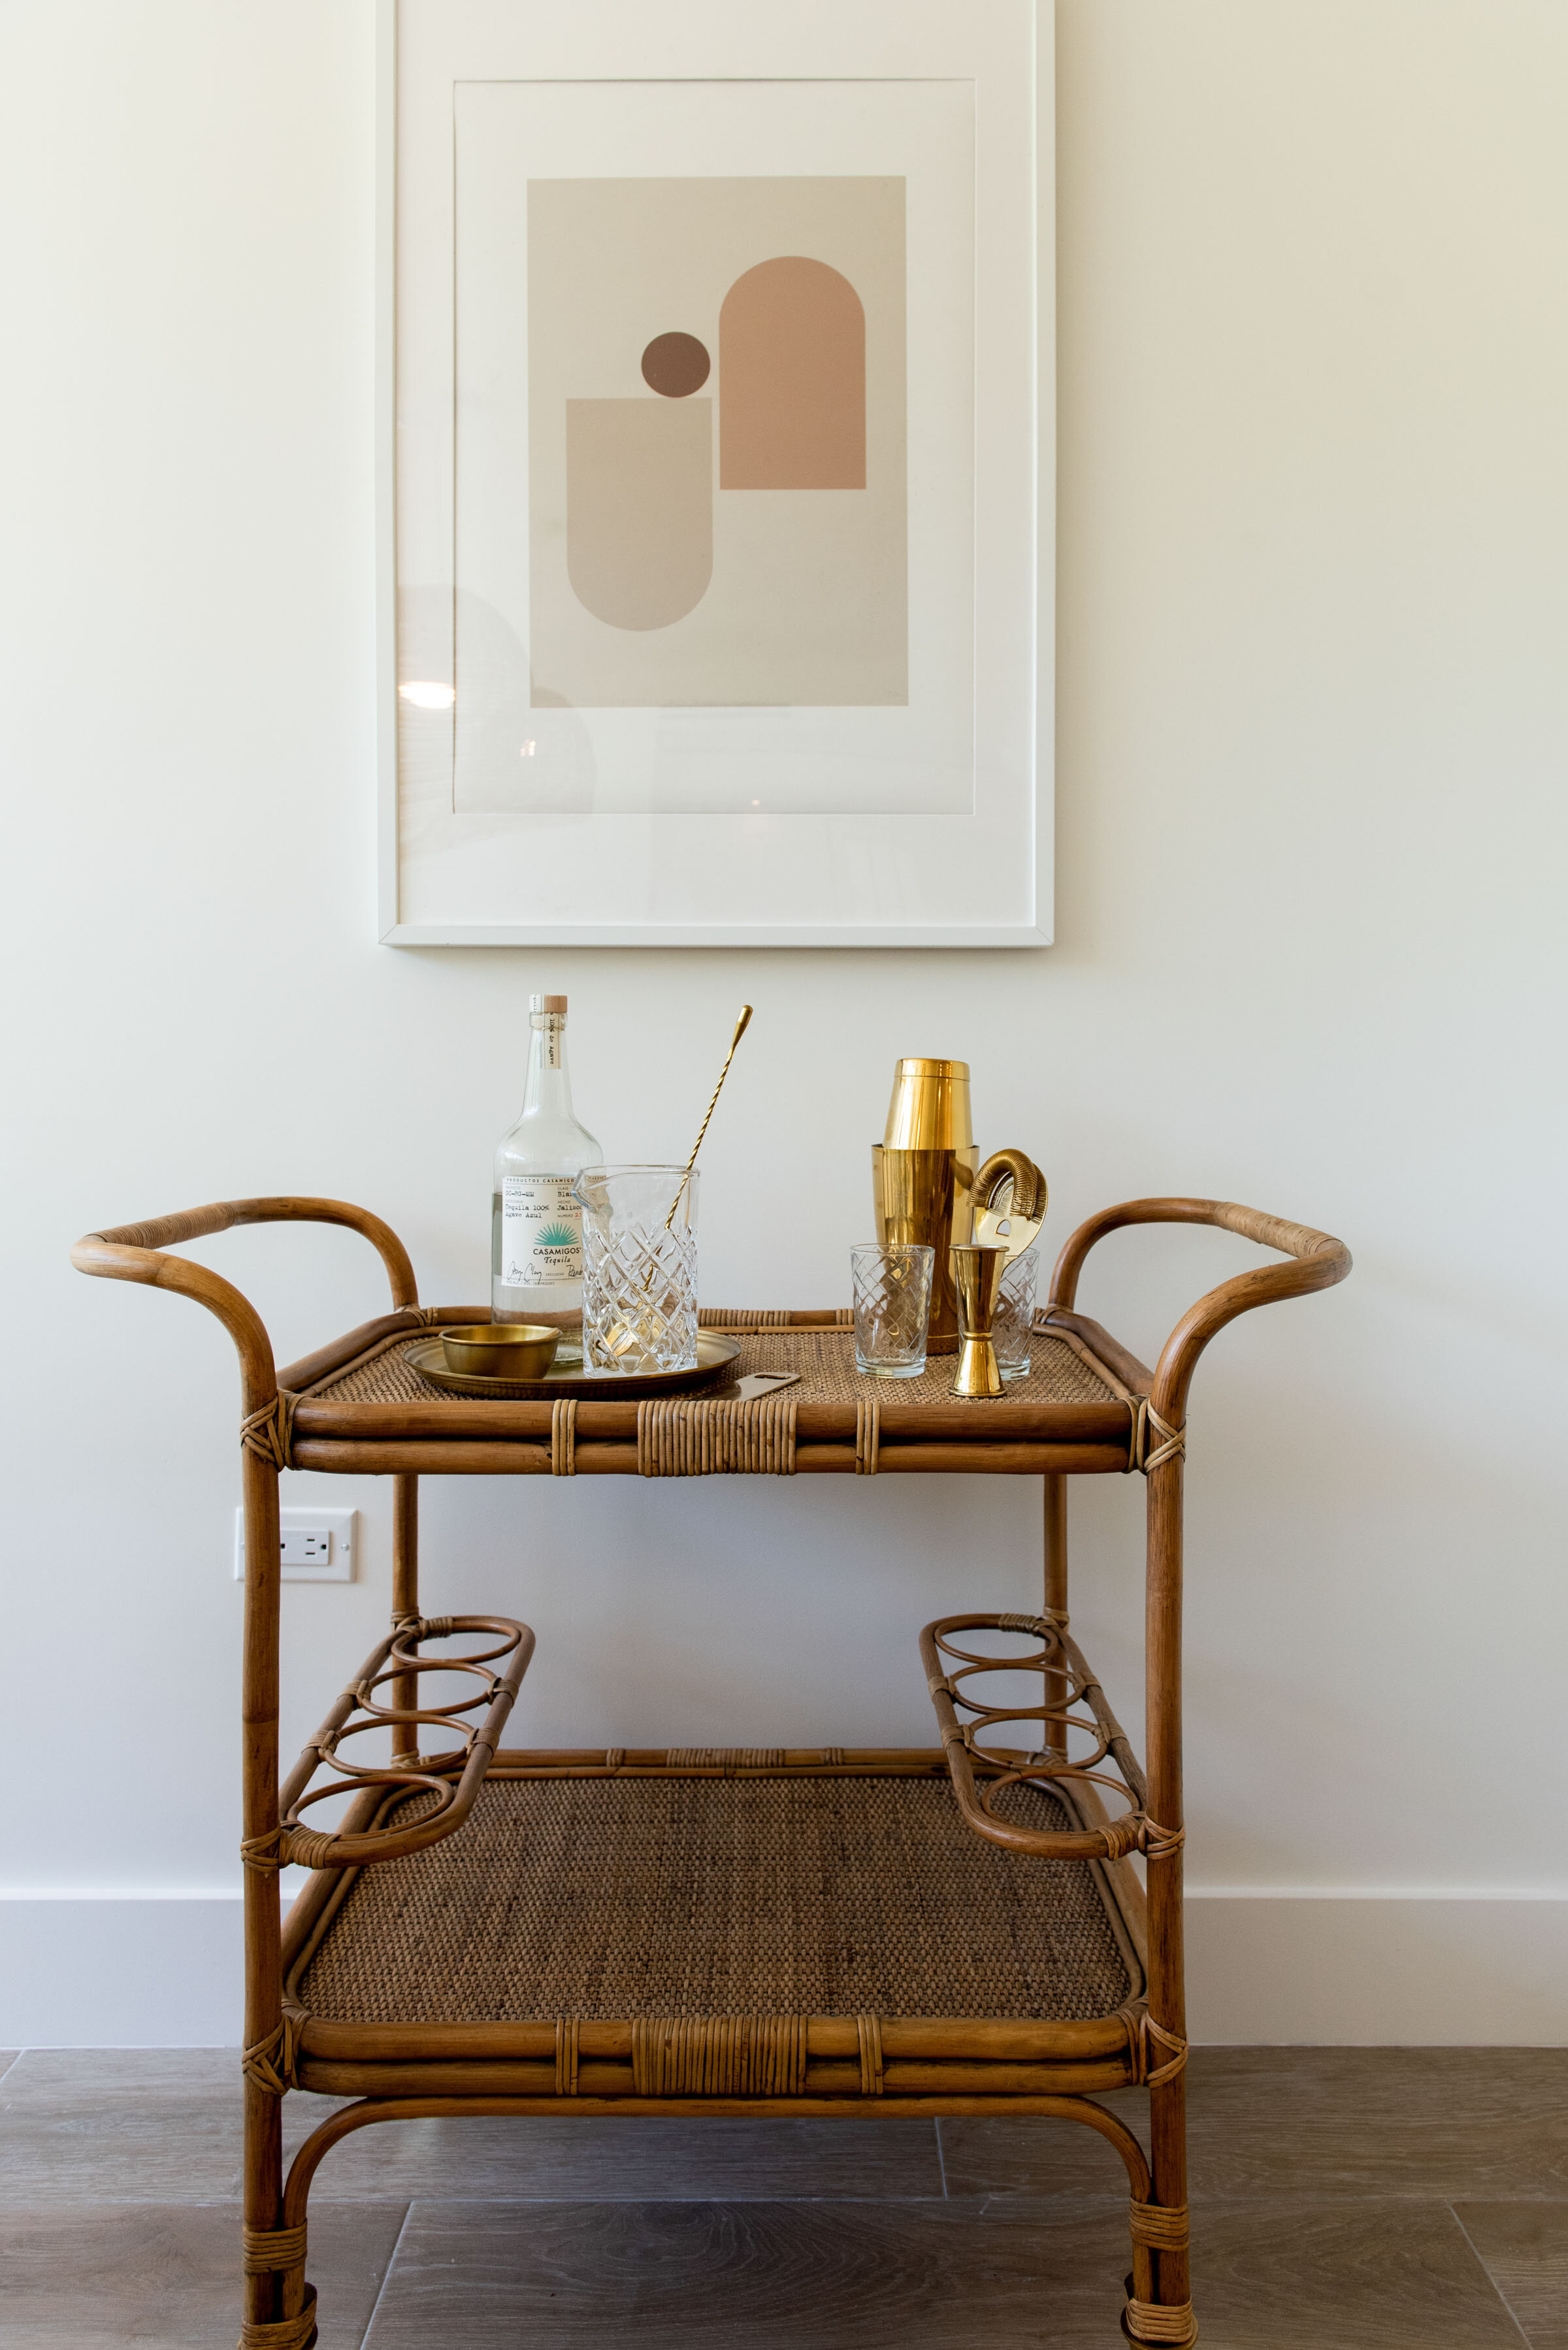
Items (all sourced, delivered and installed by Label C unless otherwise specified): : 10 Seater Dining Table (Label C) // Wishbone Dining Chairs (Wayfair) // Rattan Peel Pendant Lights (Label C) // Cotton Striped 9x12 Rug (Label C) // Rattan Bar Cart (similar here from Label C) // Artwork (The Poster Club) curated by Label C)
The Master Bedroom & Bathroom
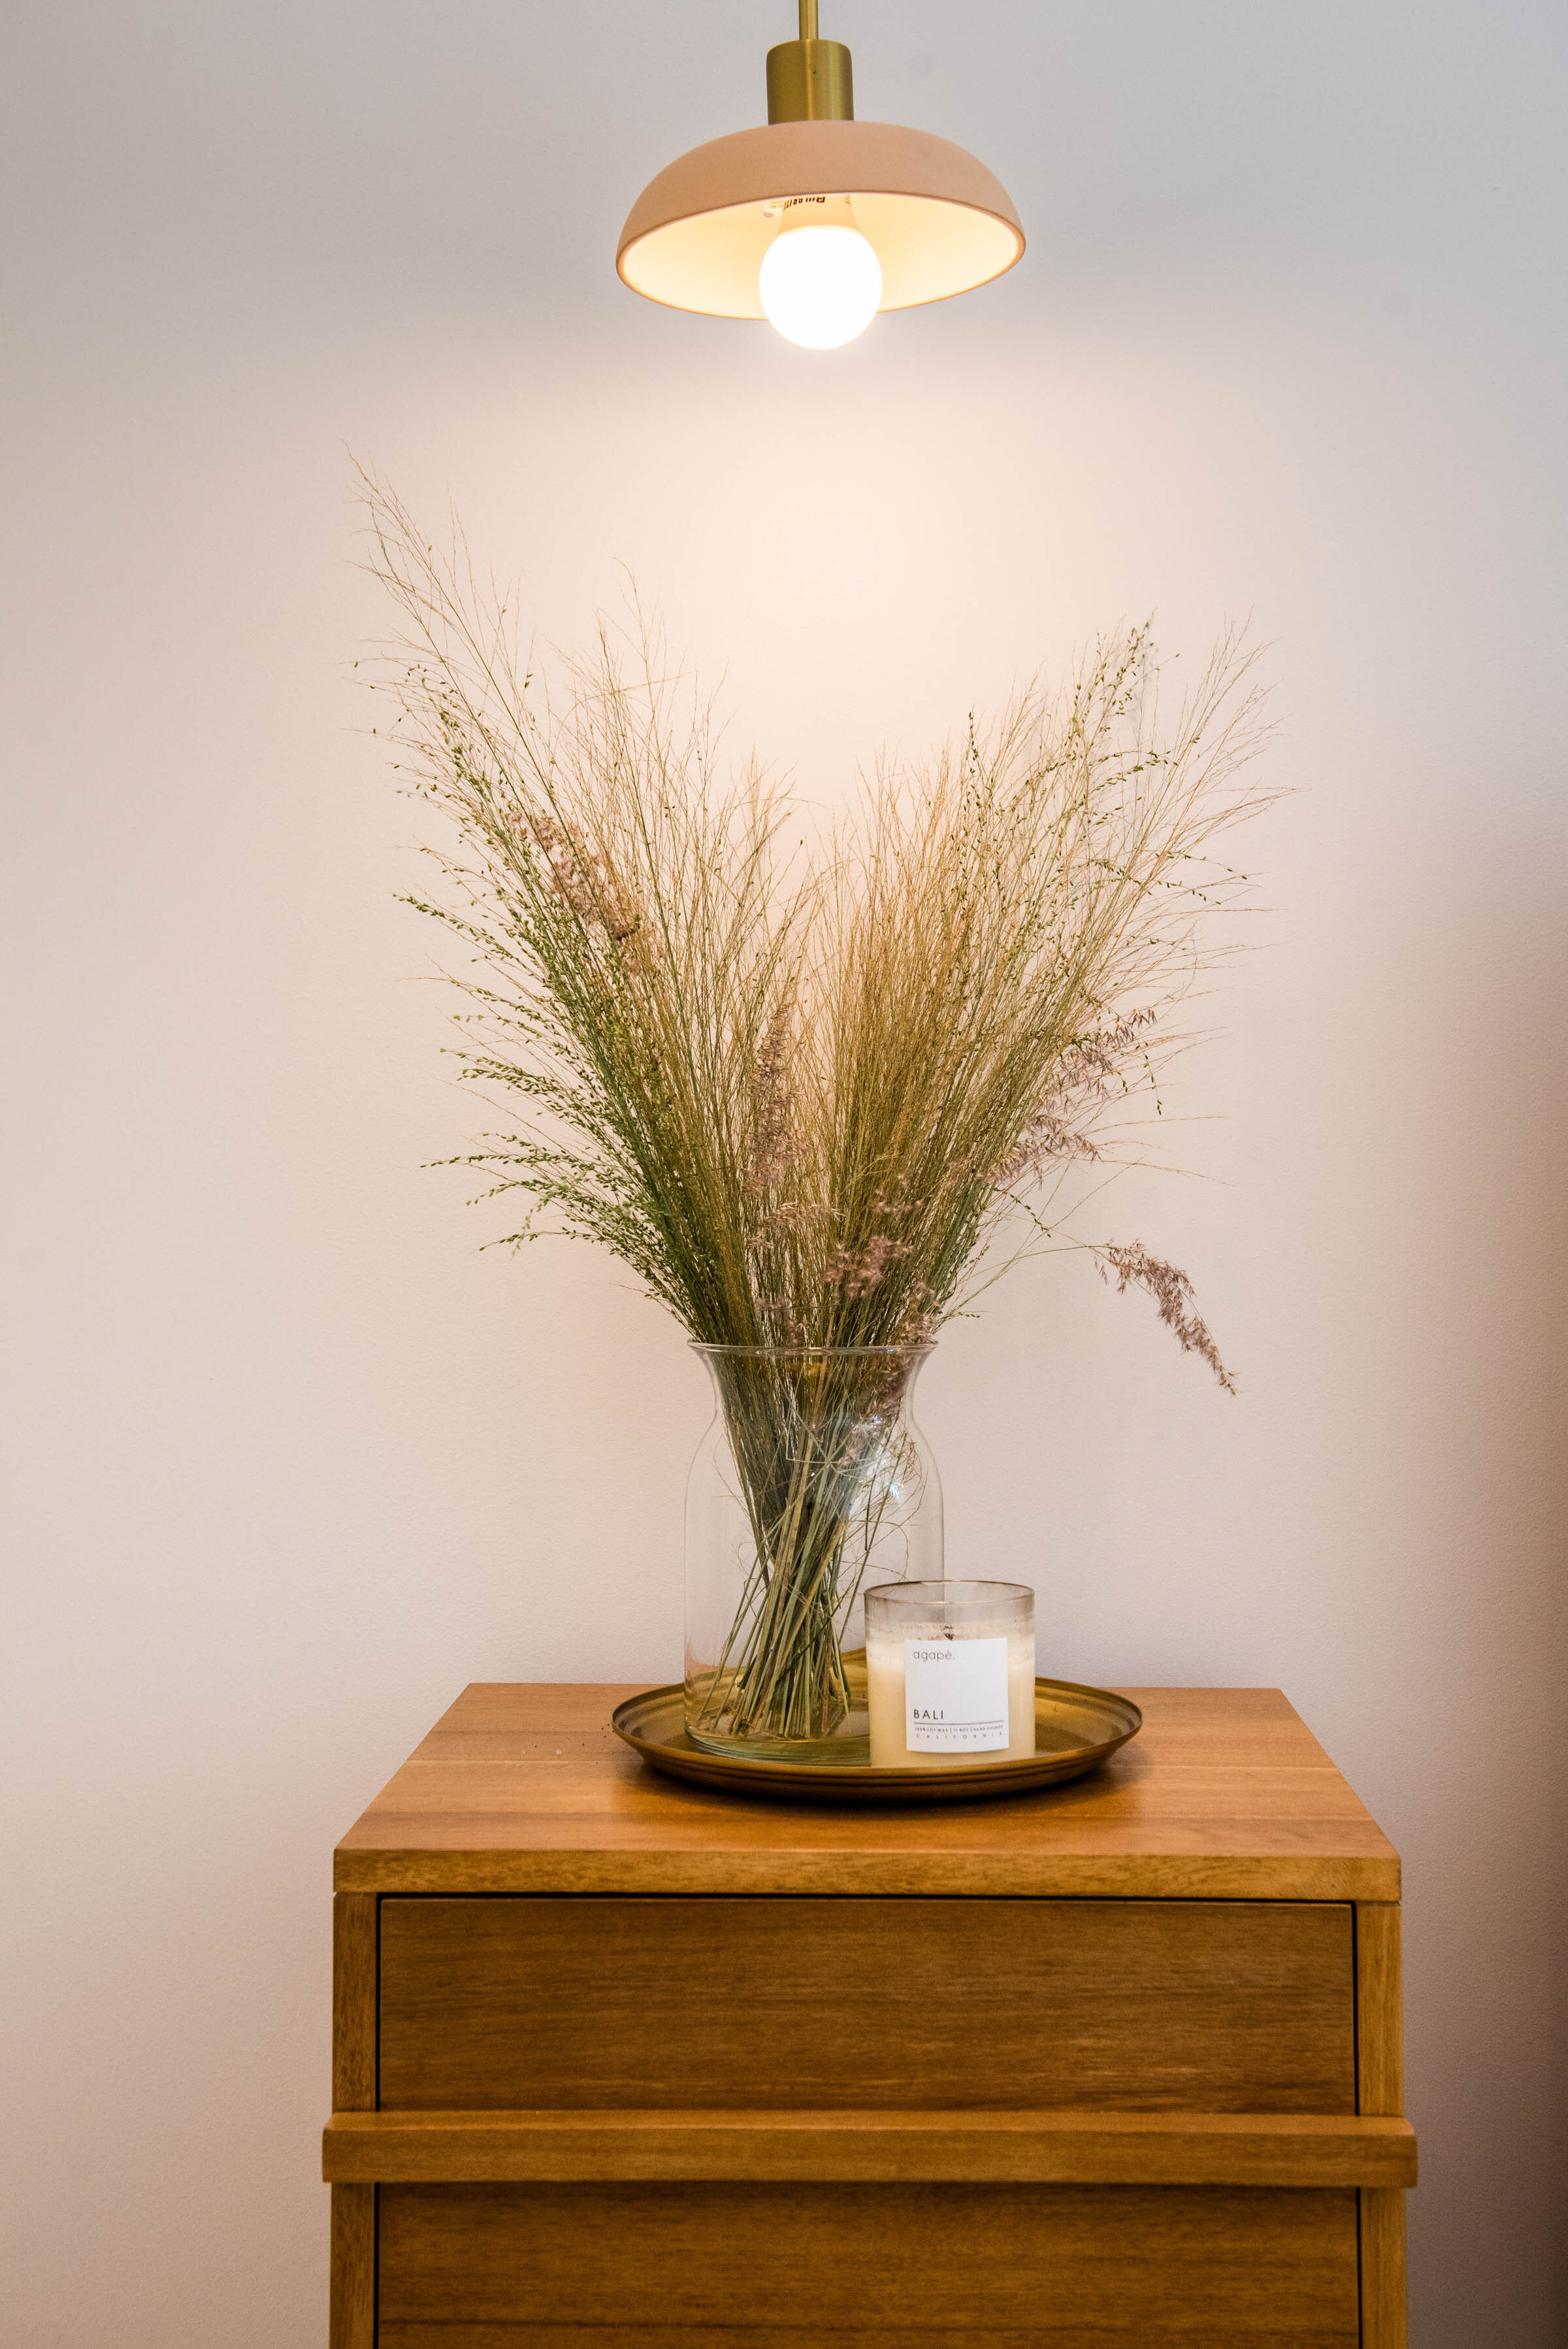
By swapping out the windows and resizing them, we were able to move the bed and headboard to the opposite wall which made for a much better use of space. Cynthia’s interior design choices made the Master Bedroom feel extra luxe (just as it should) - adding the coastal inspired furniture, layered rug, gallery wall, beautiful gold arched mirror, and the most incredible linen bedding and curated collection of vintage pillows. A bed made for big dreams!

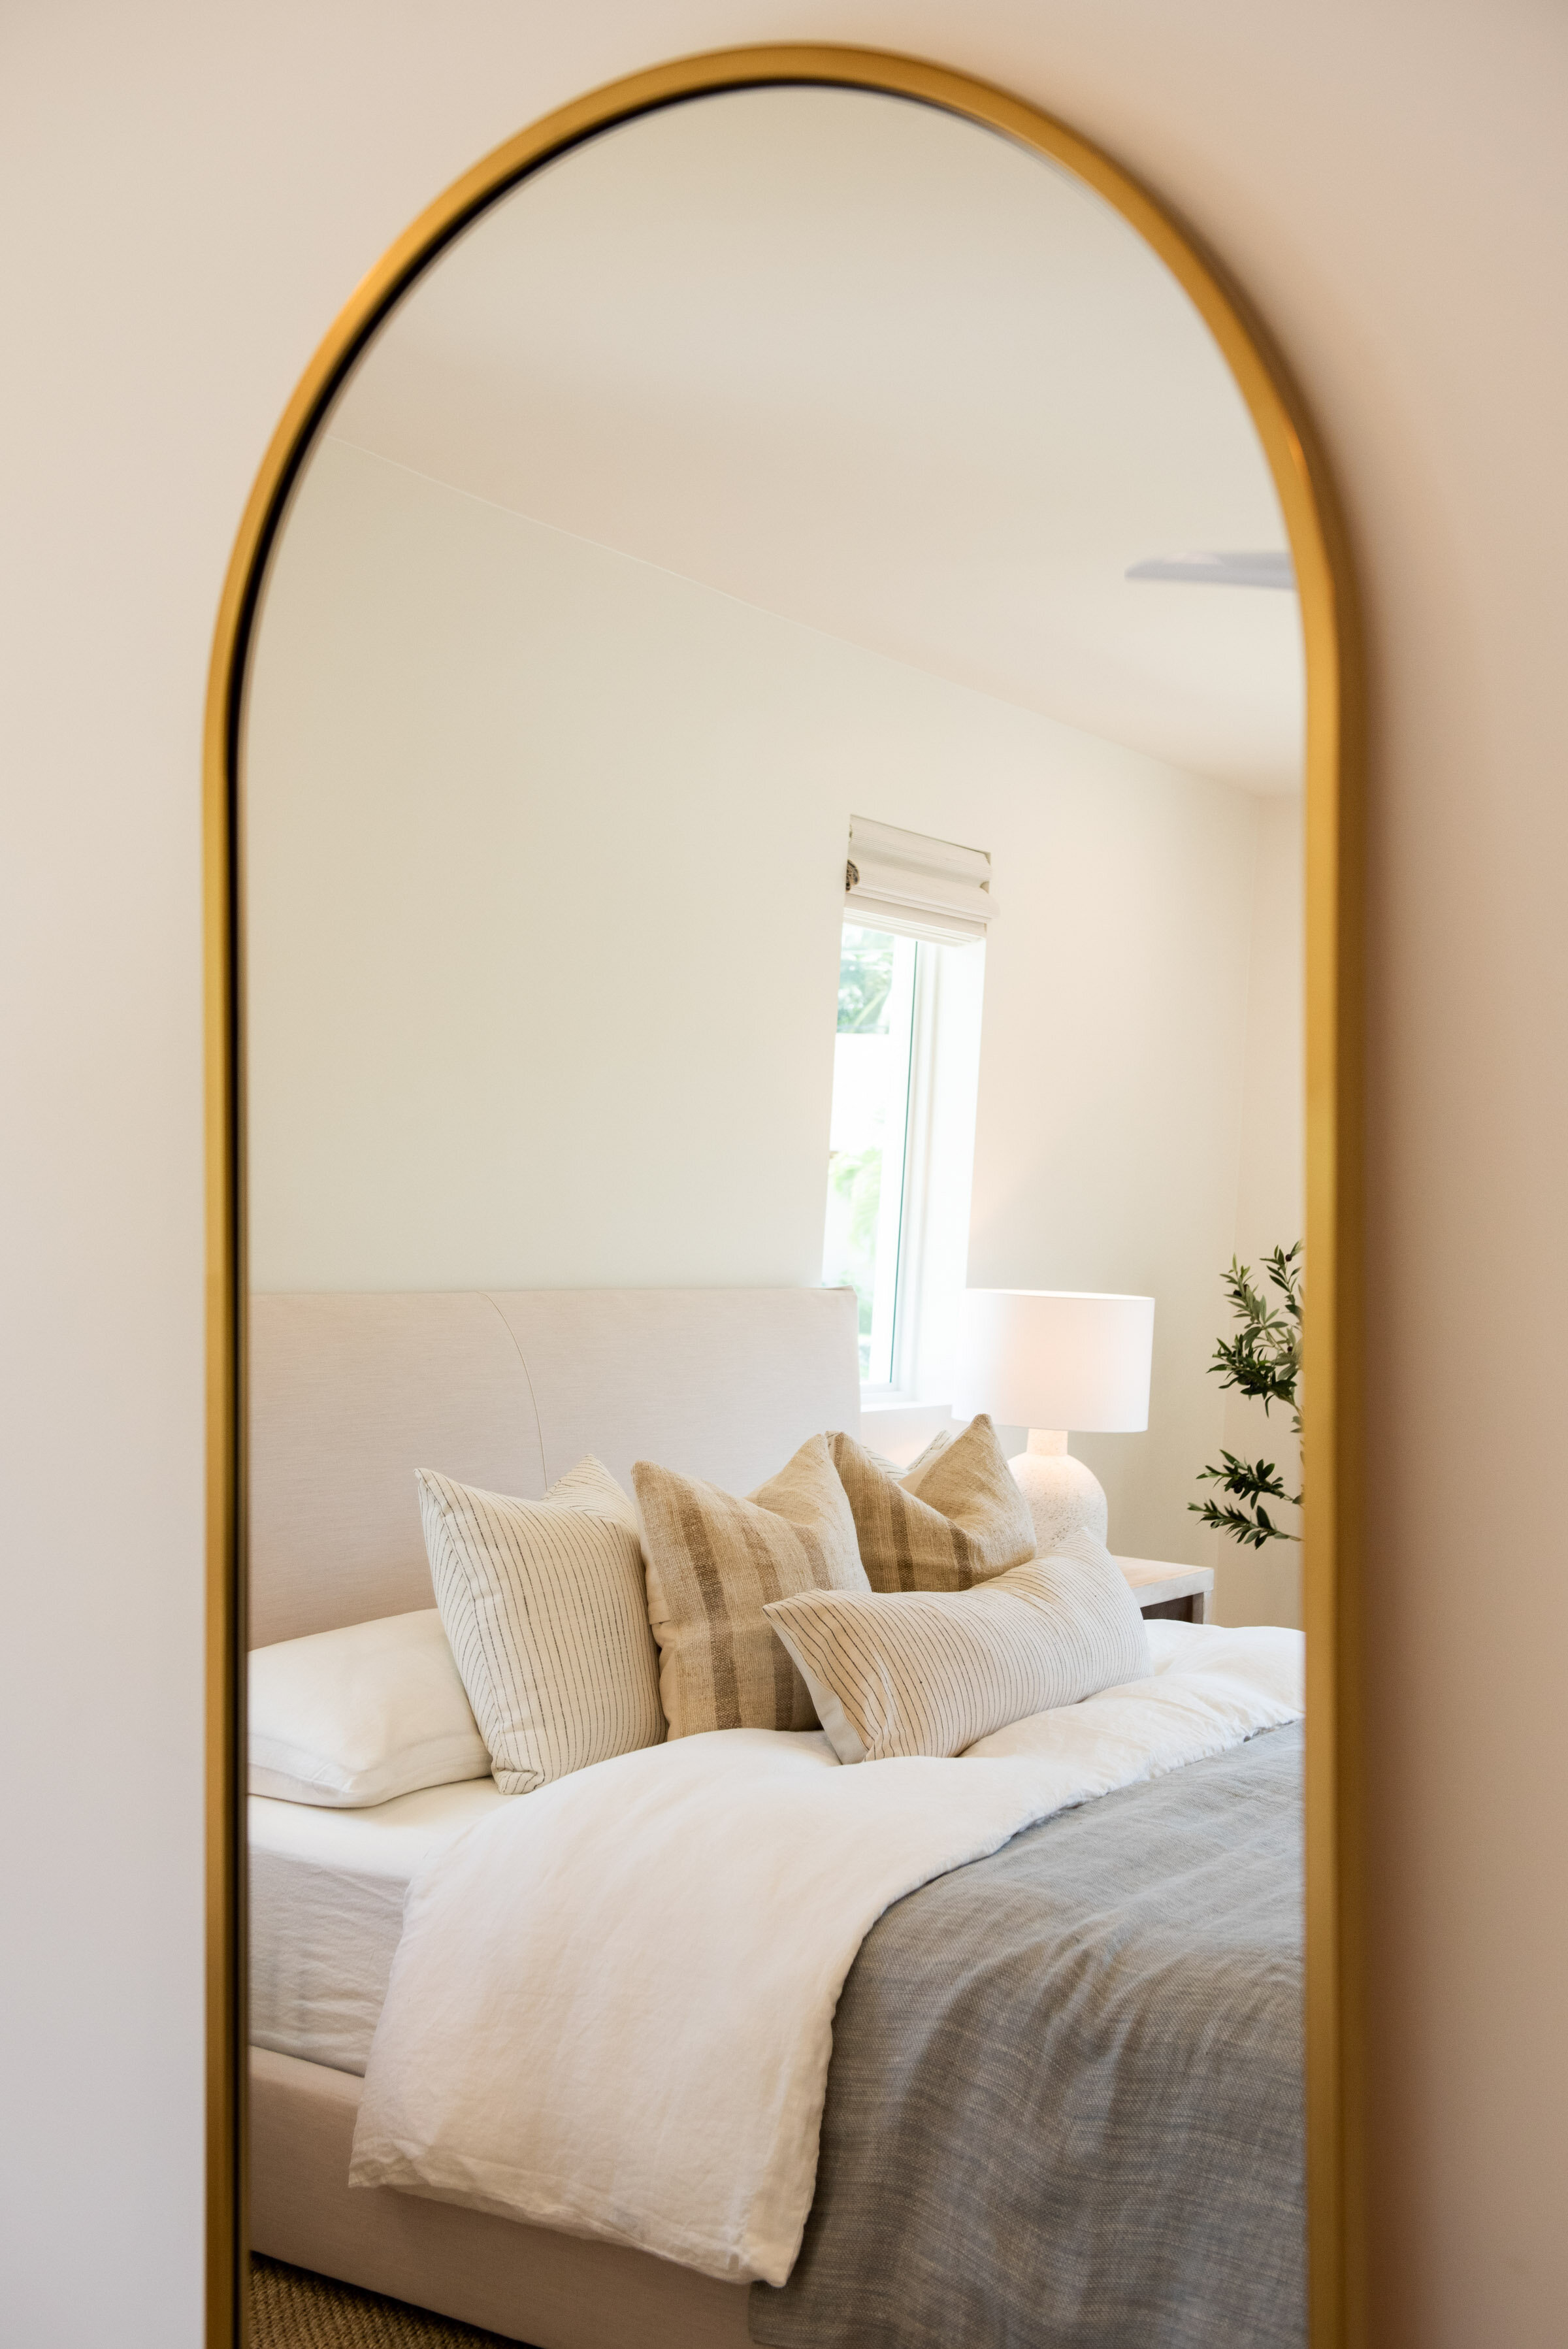
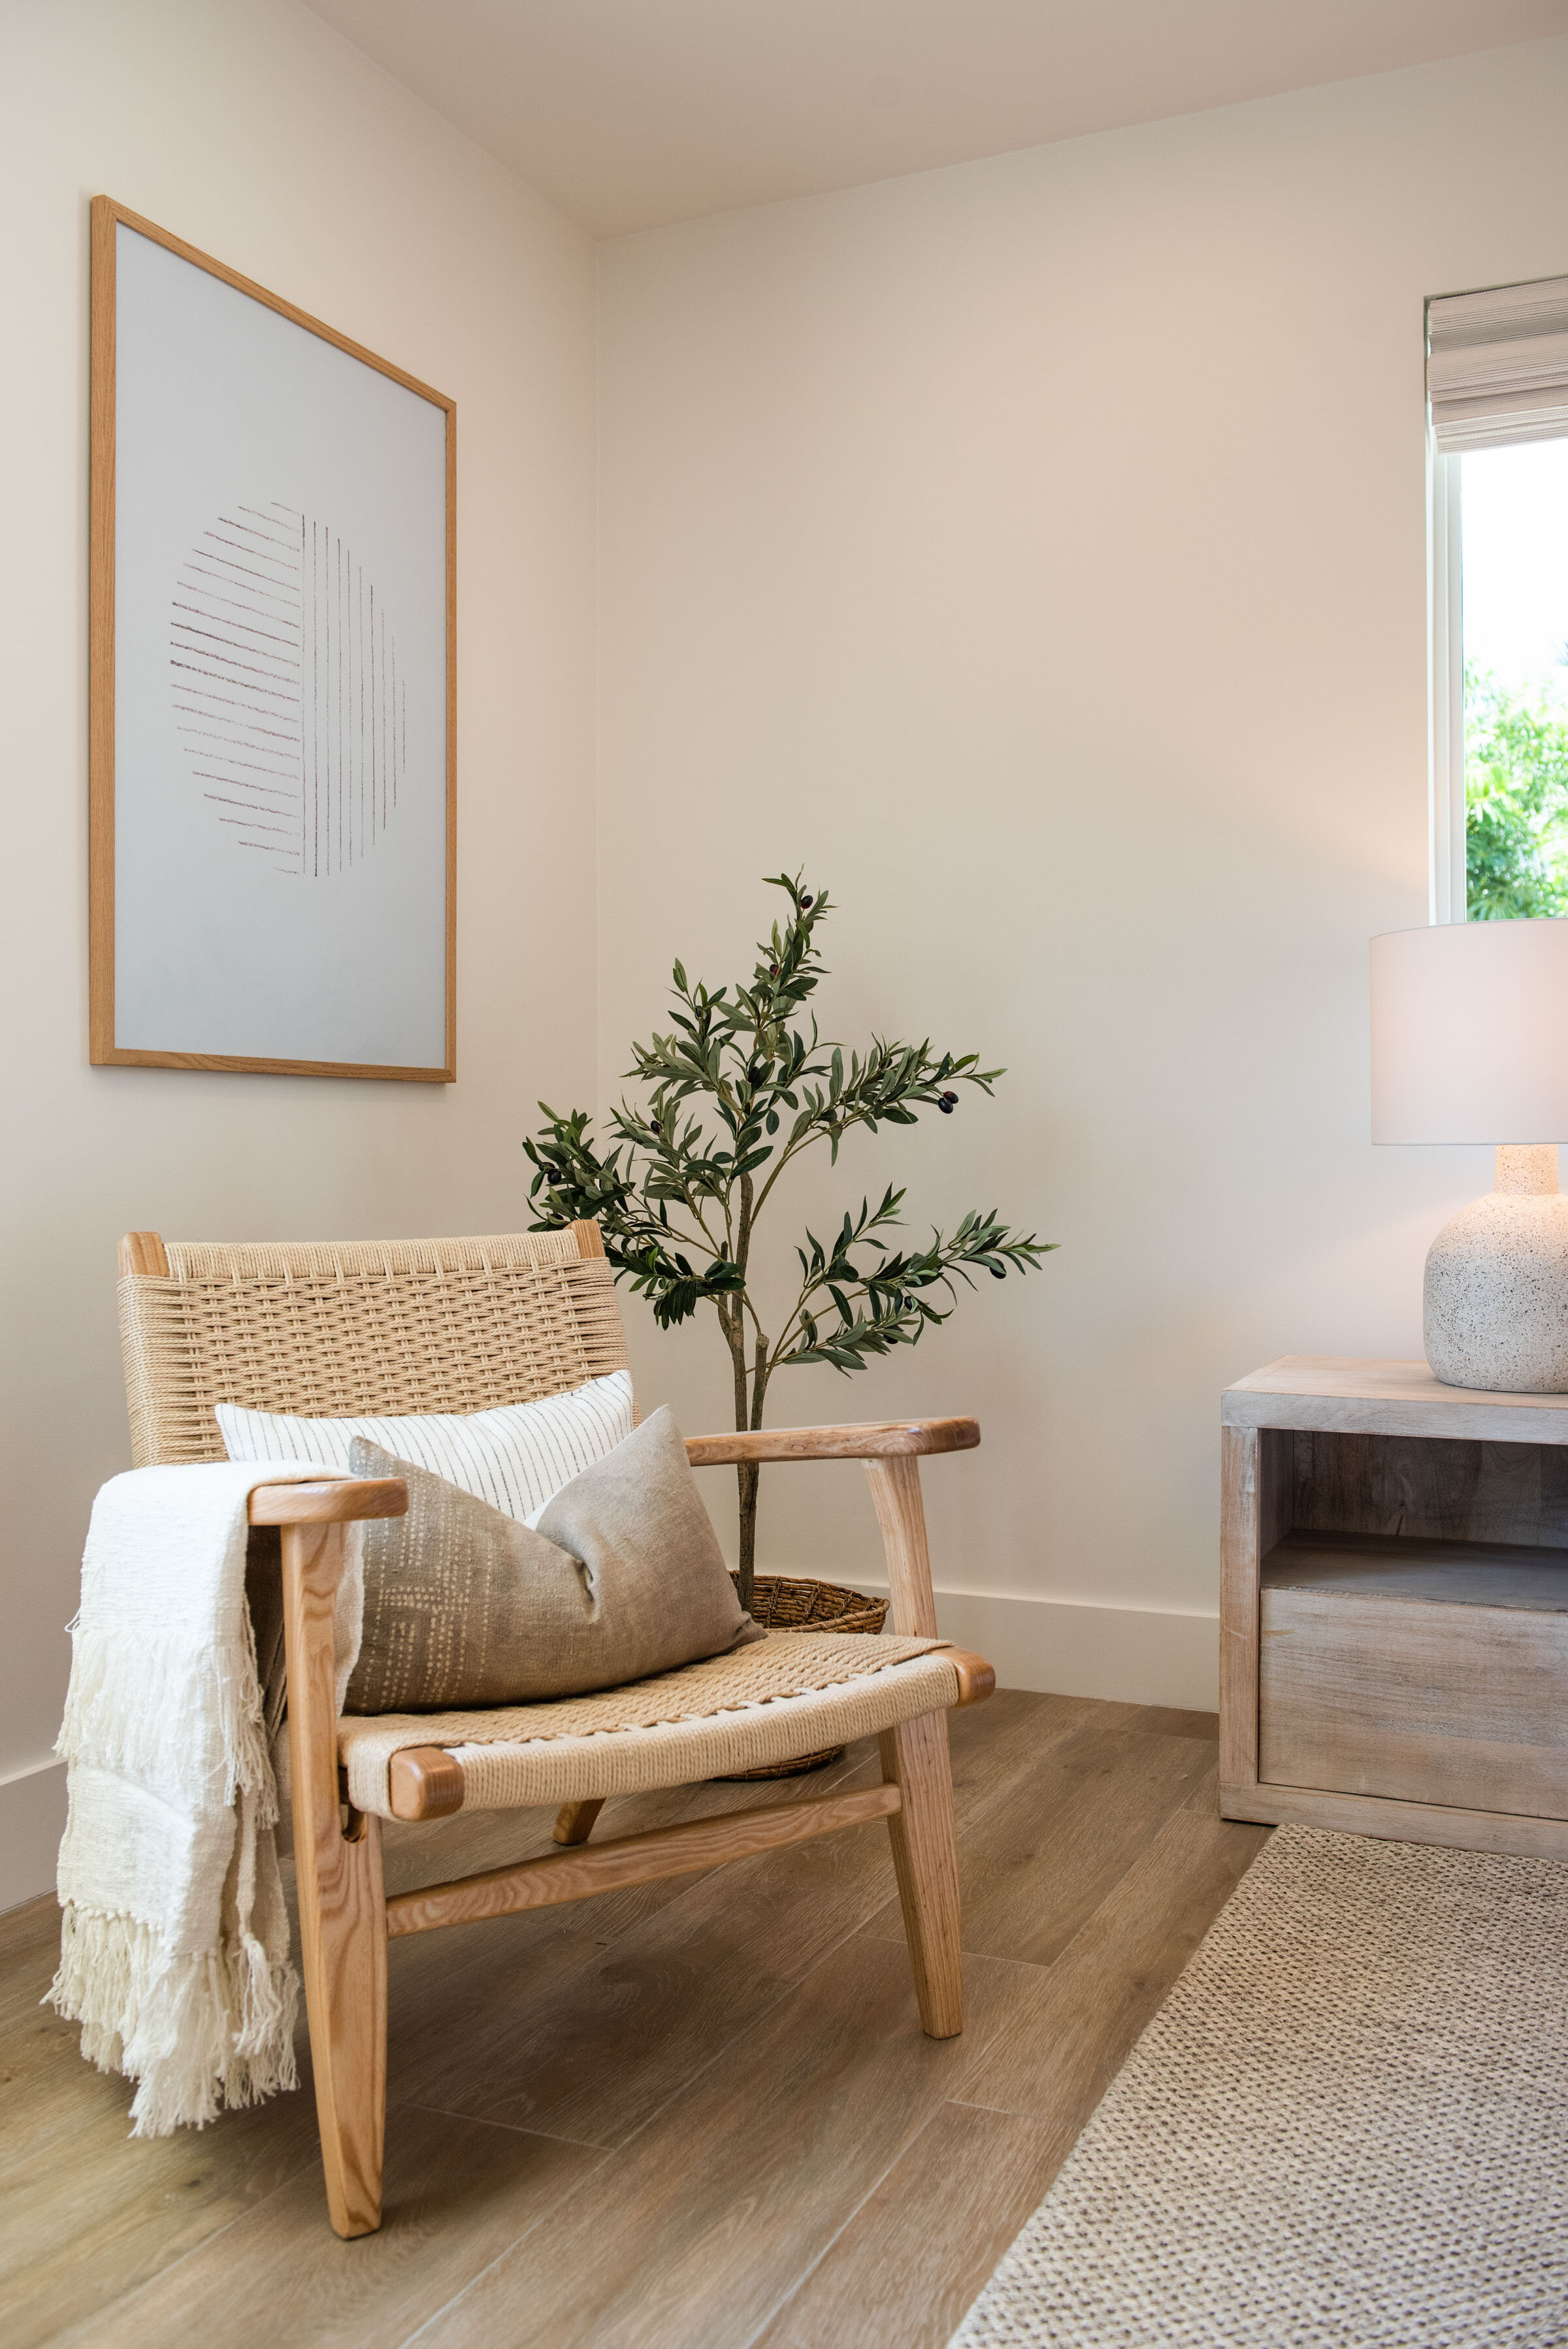
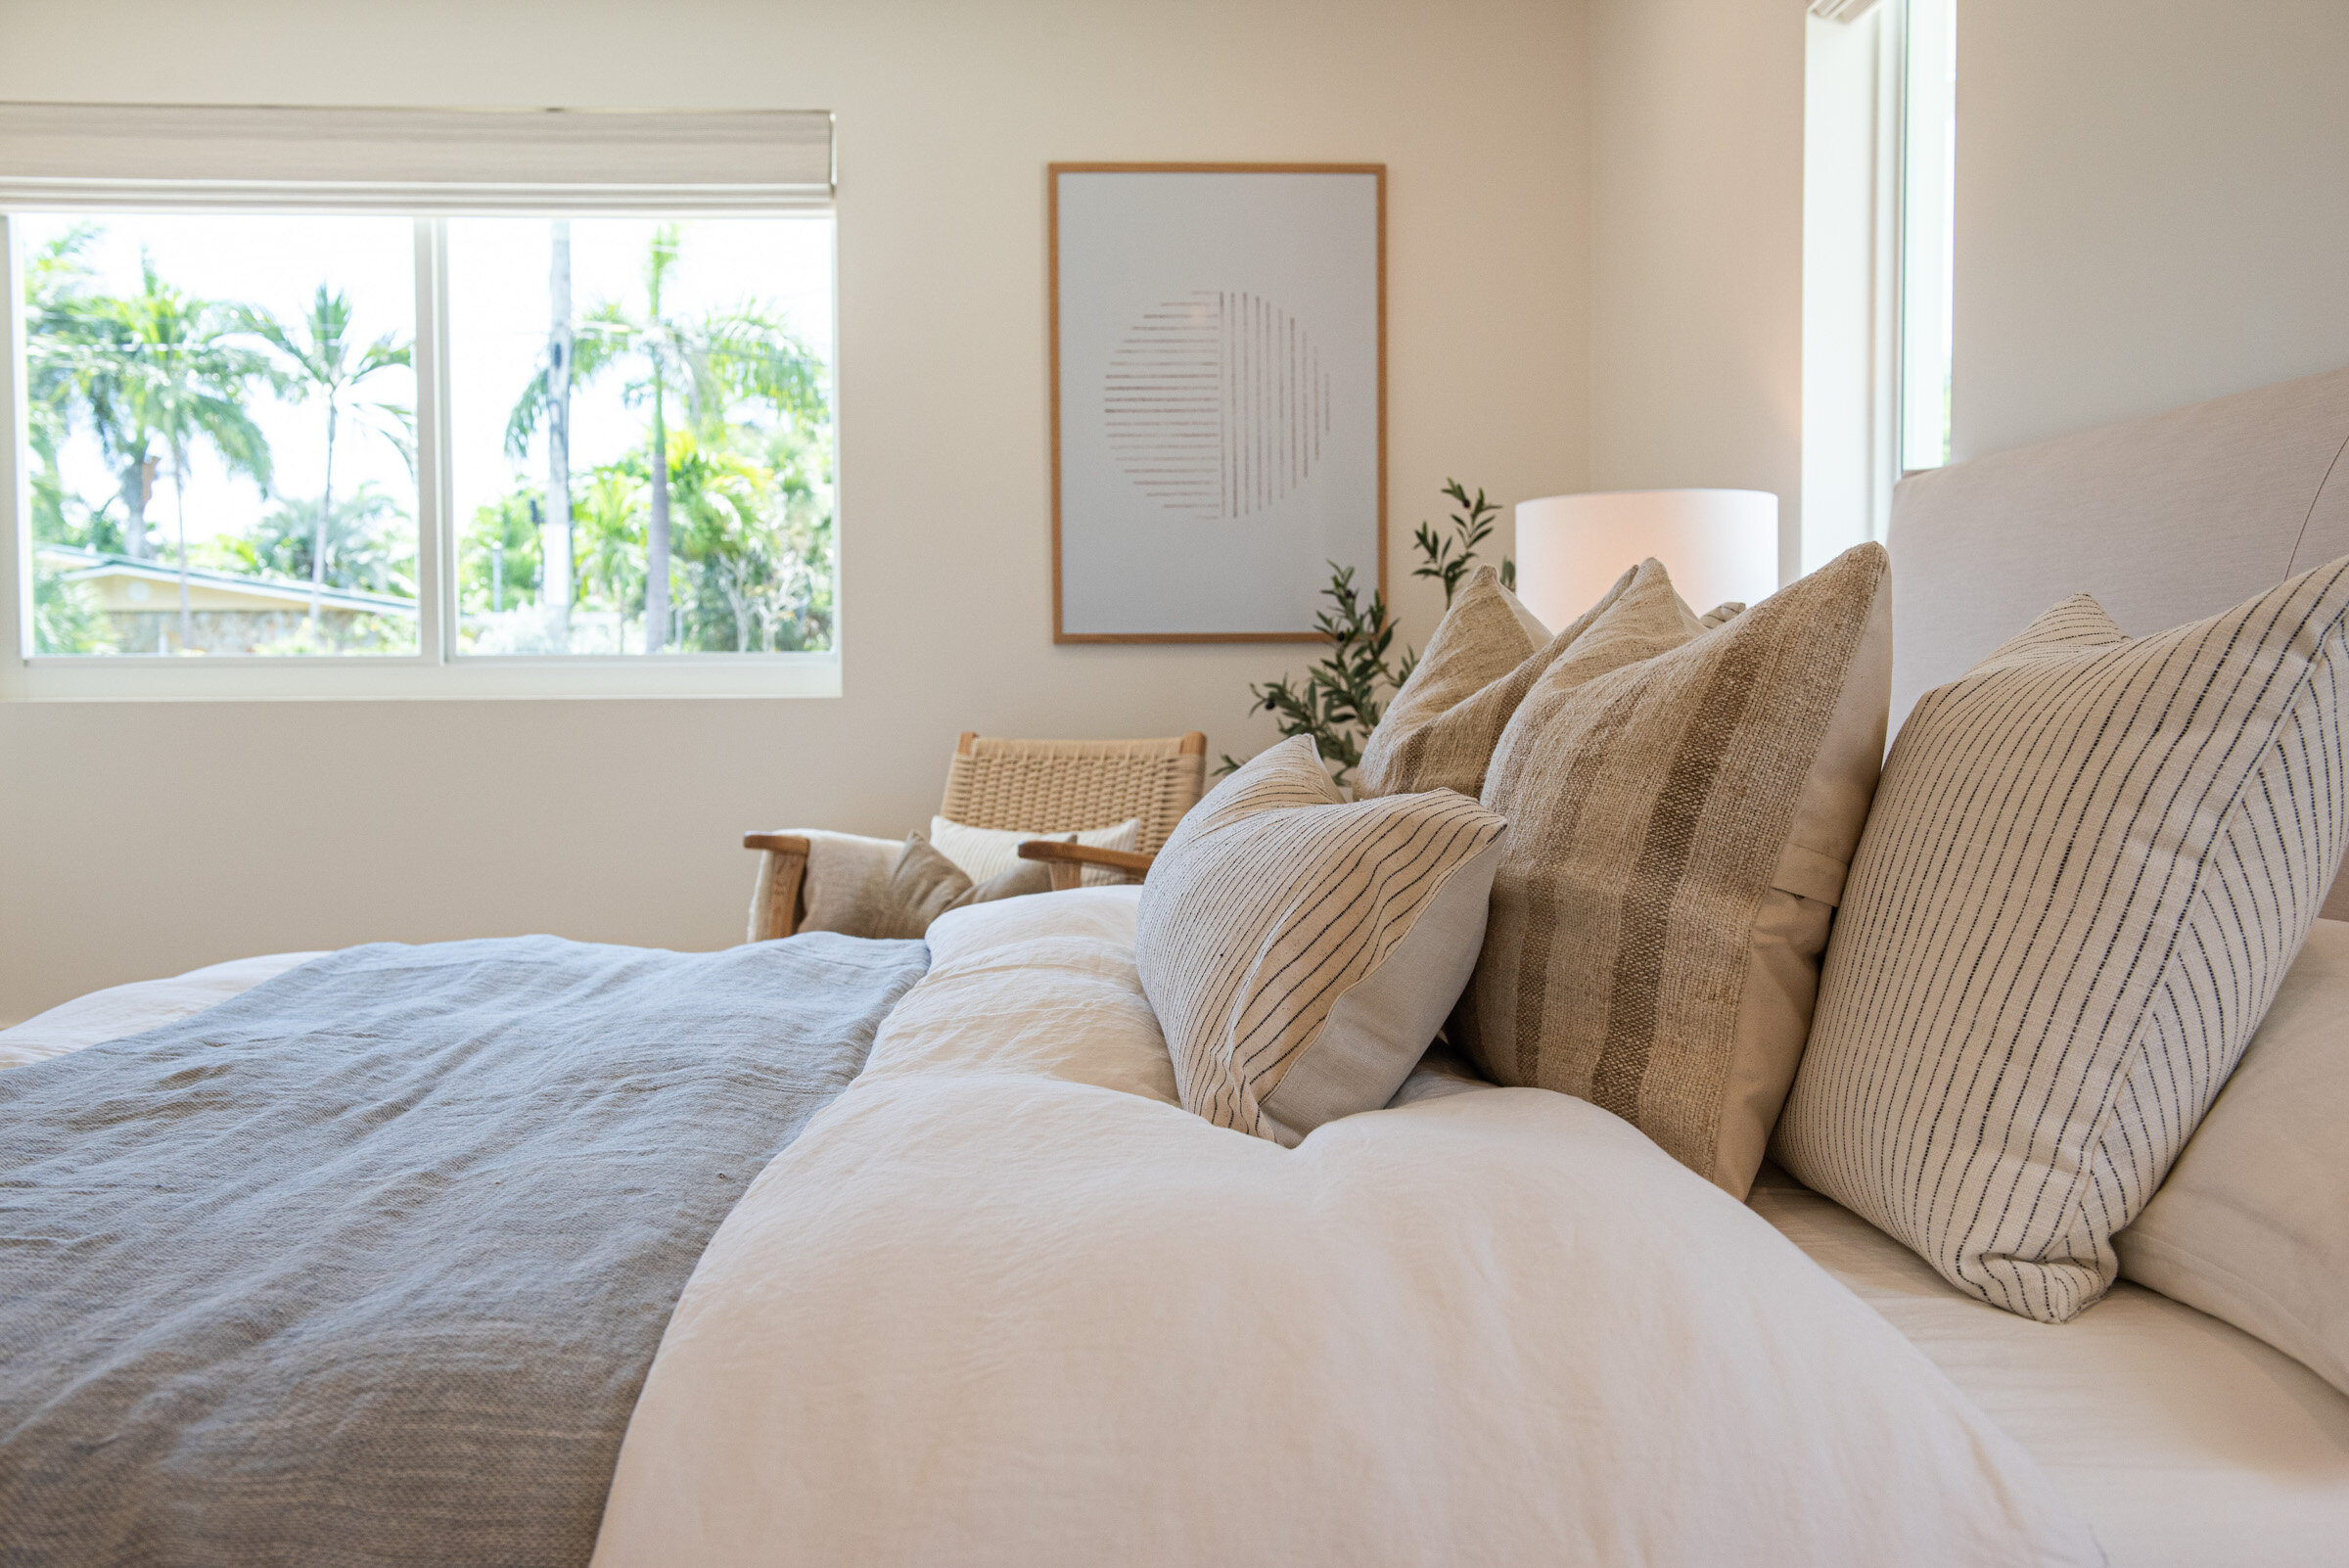
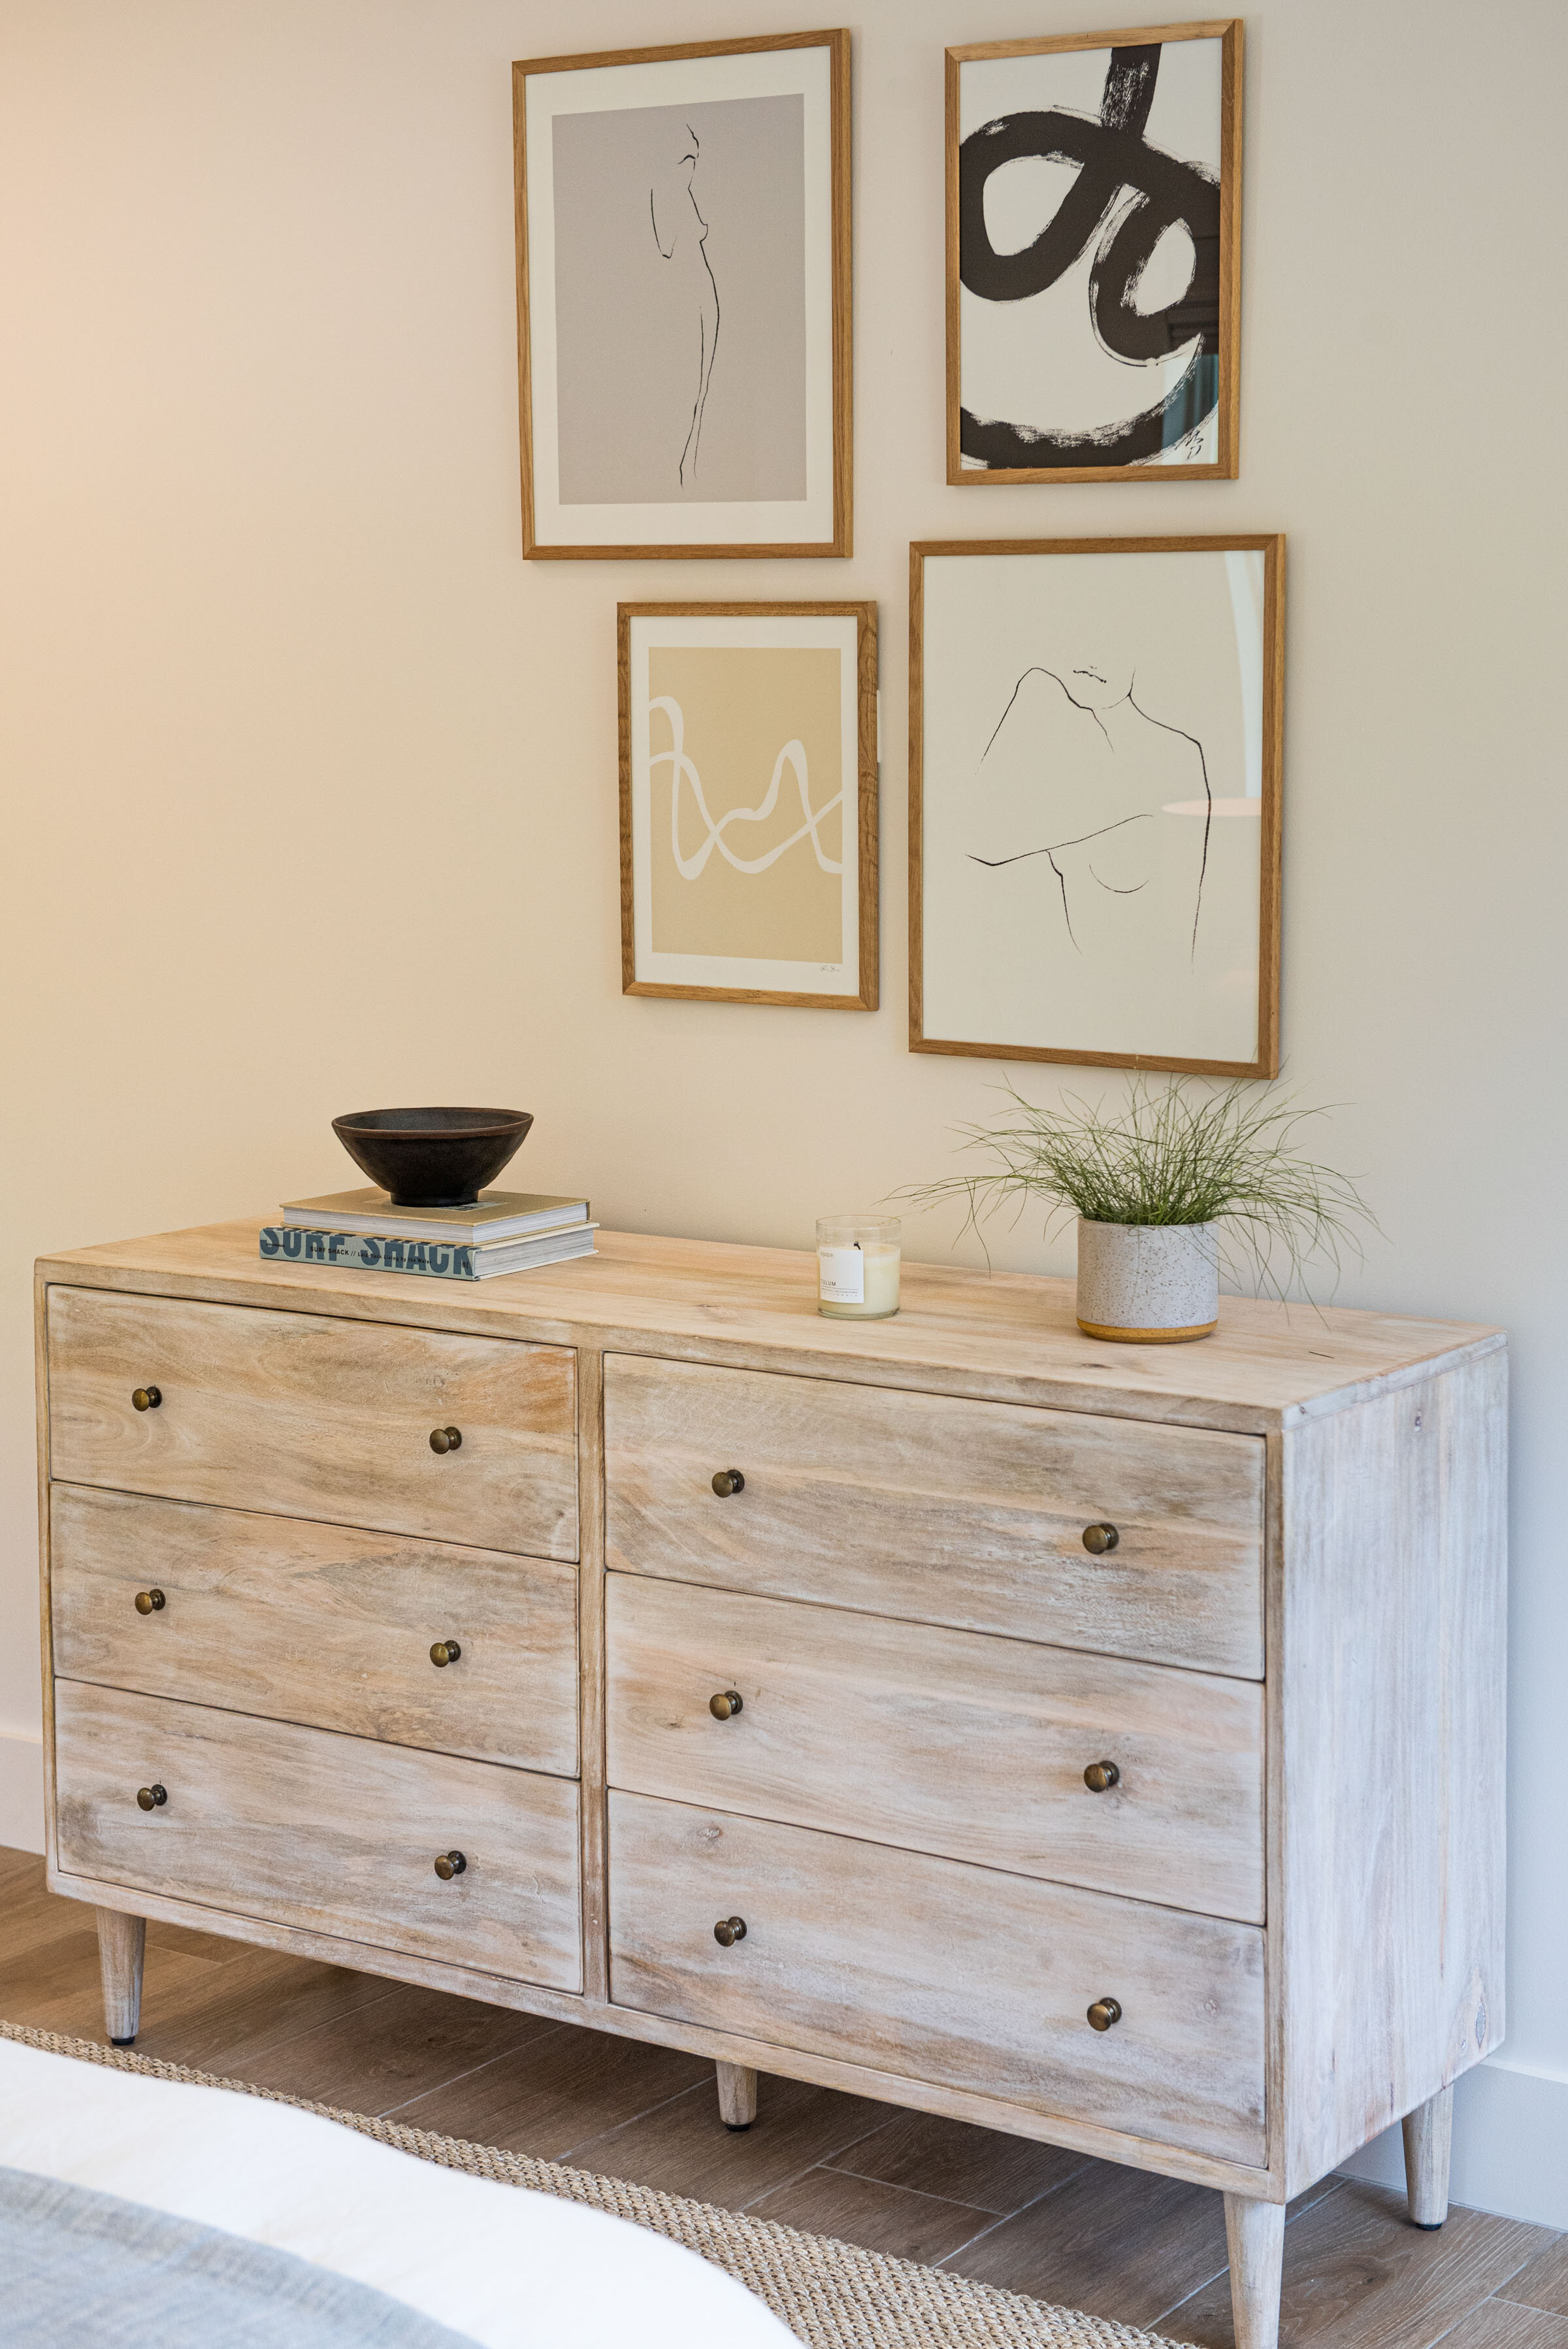
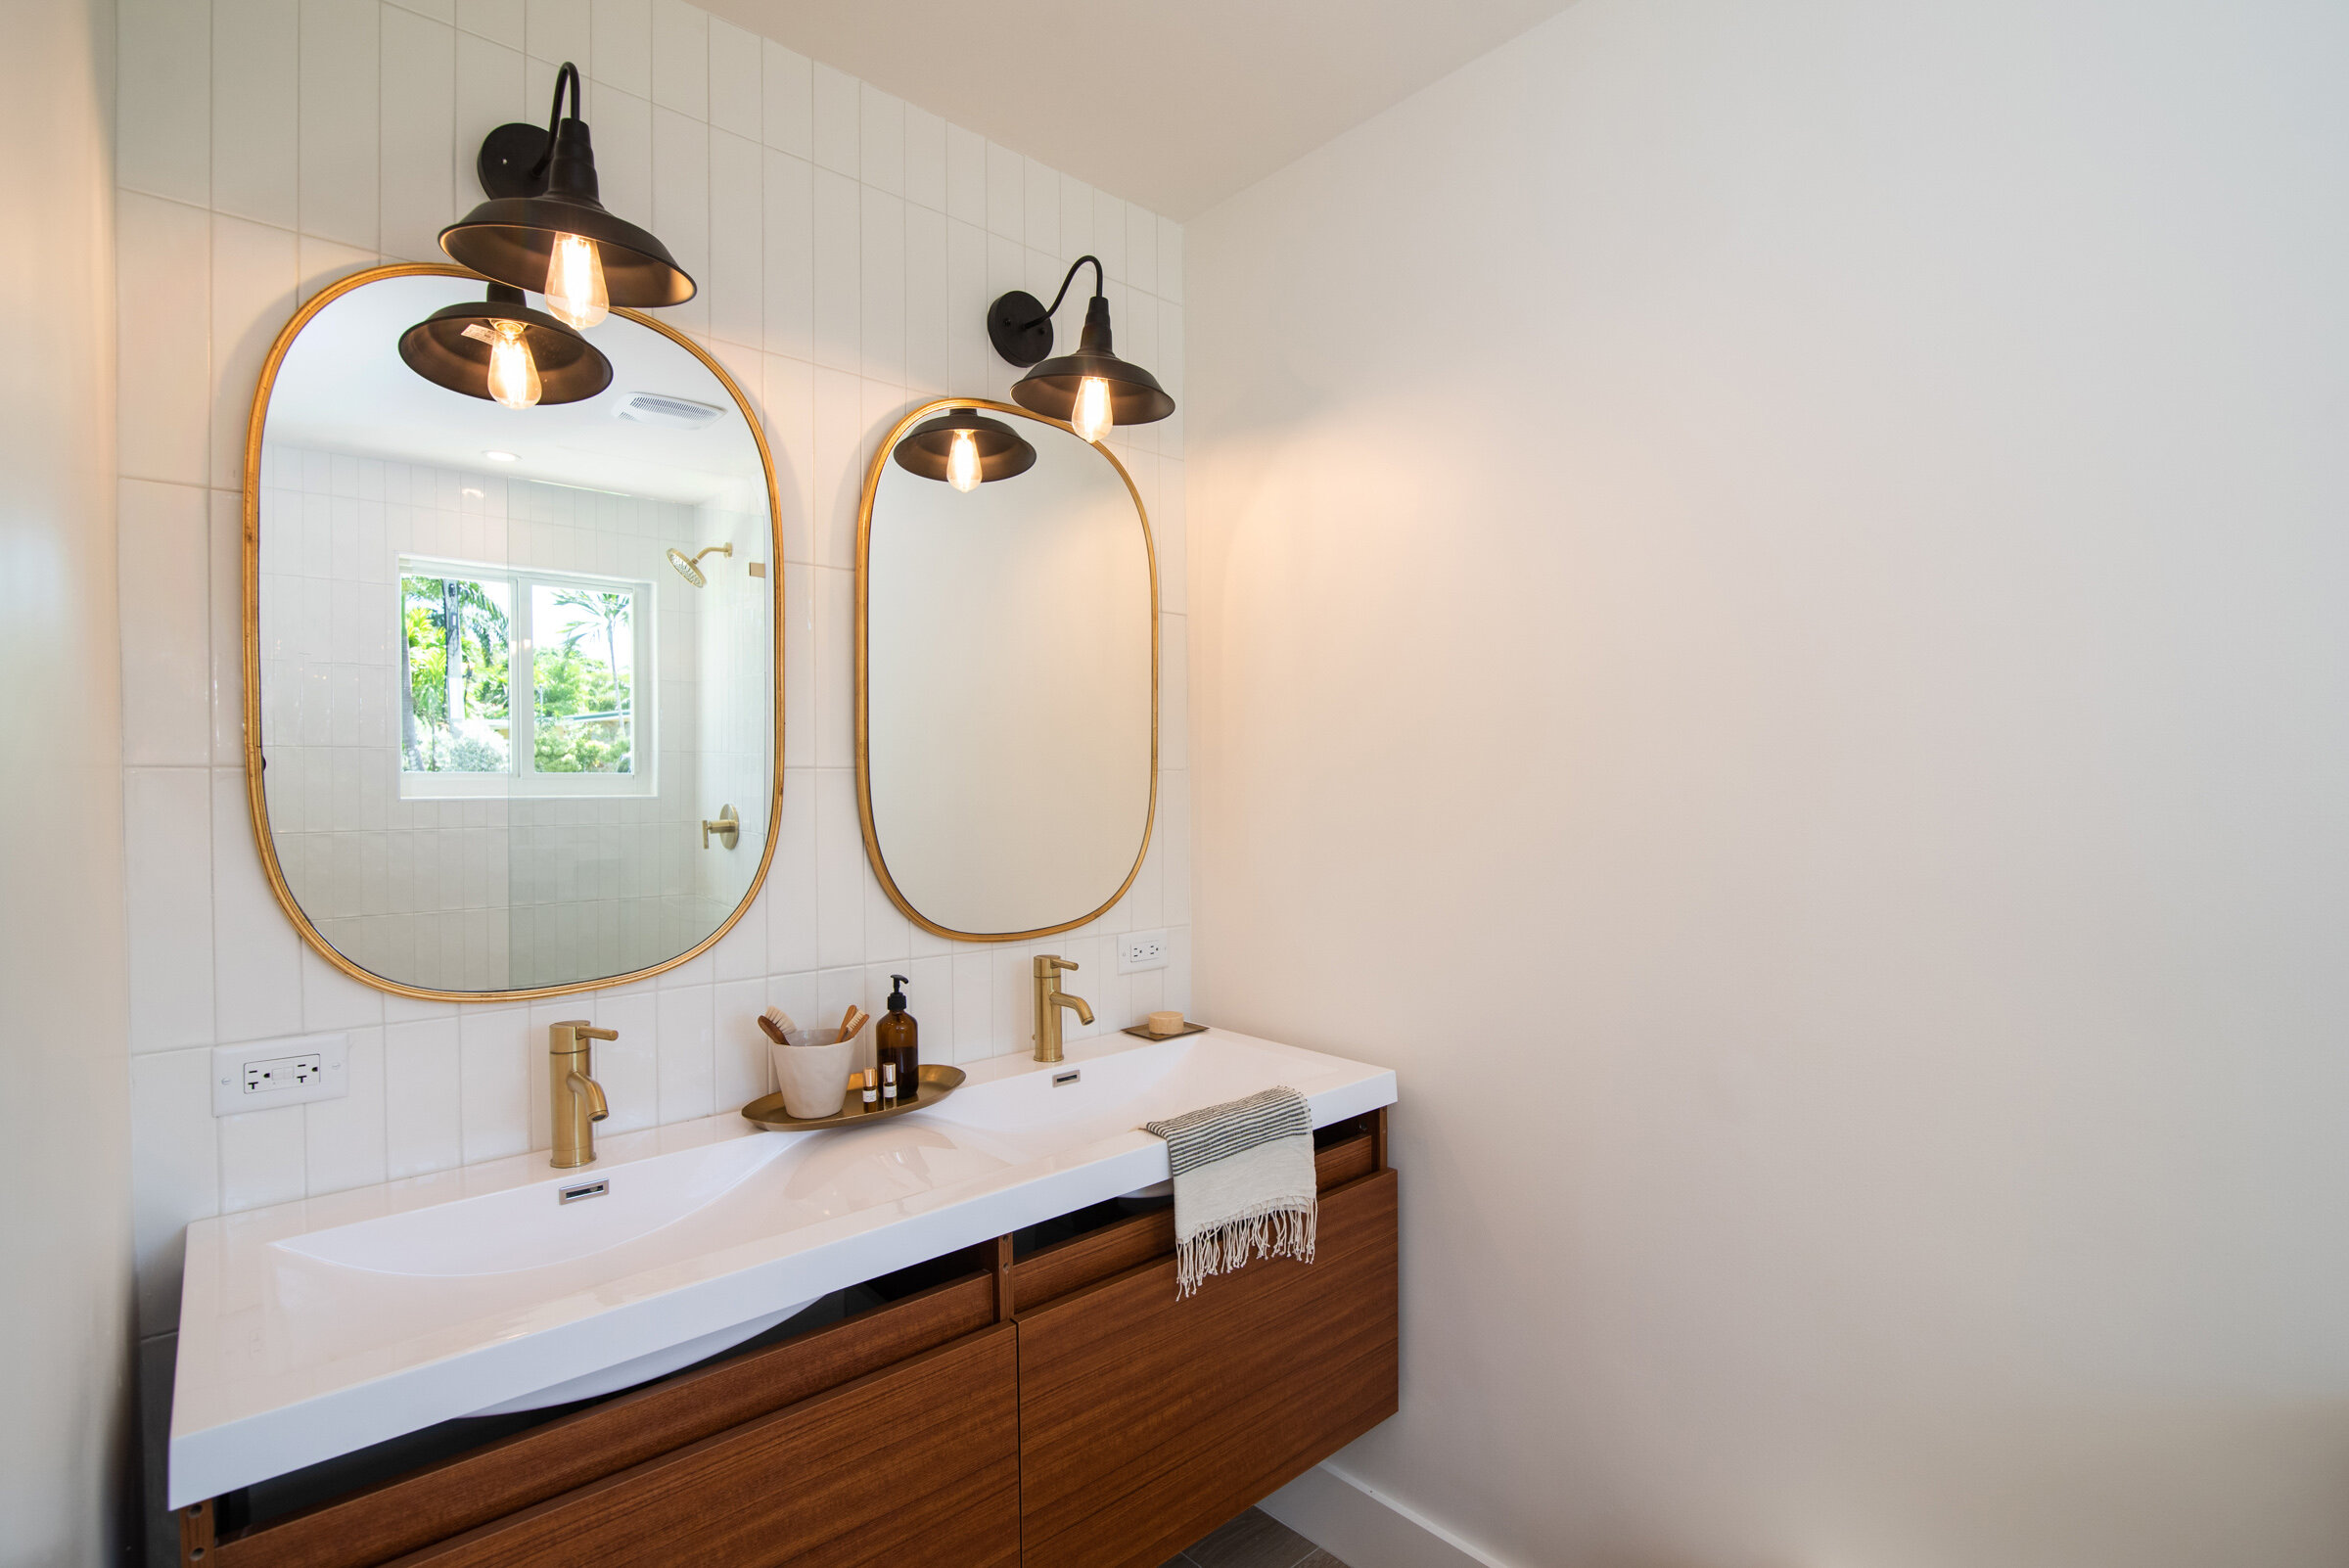
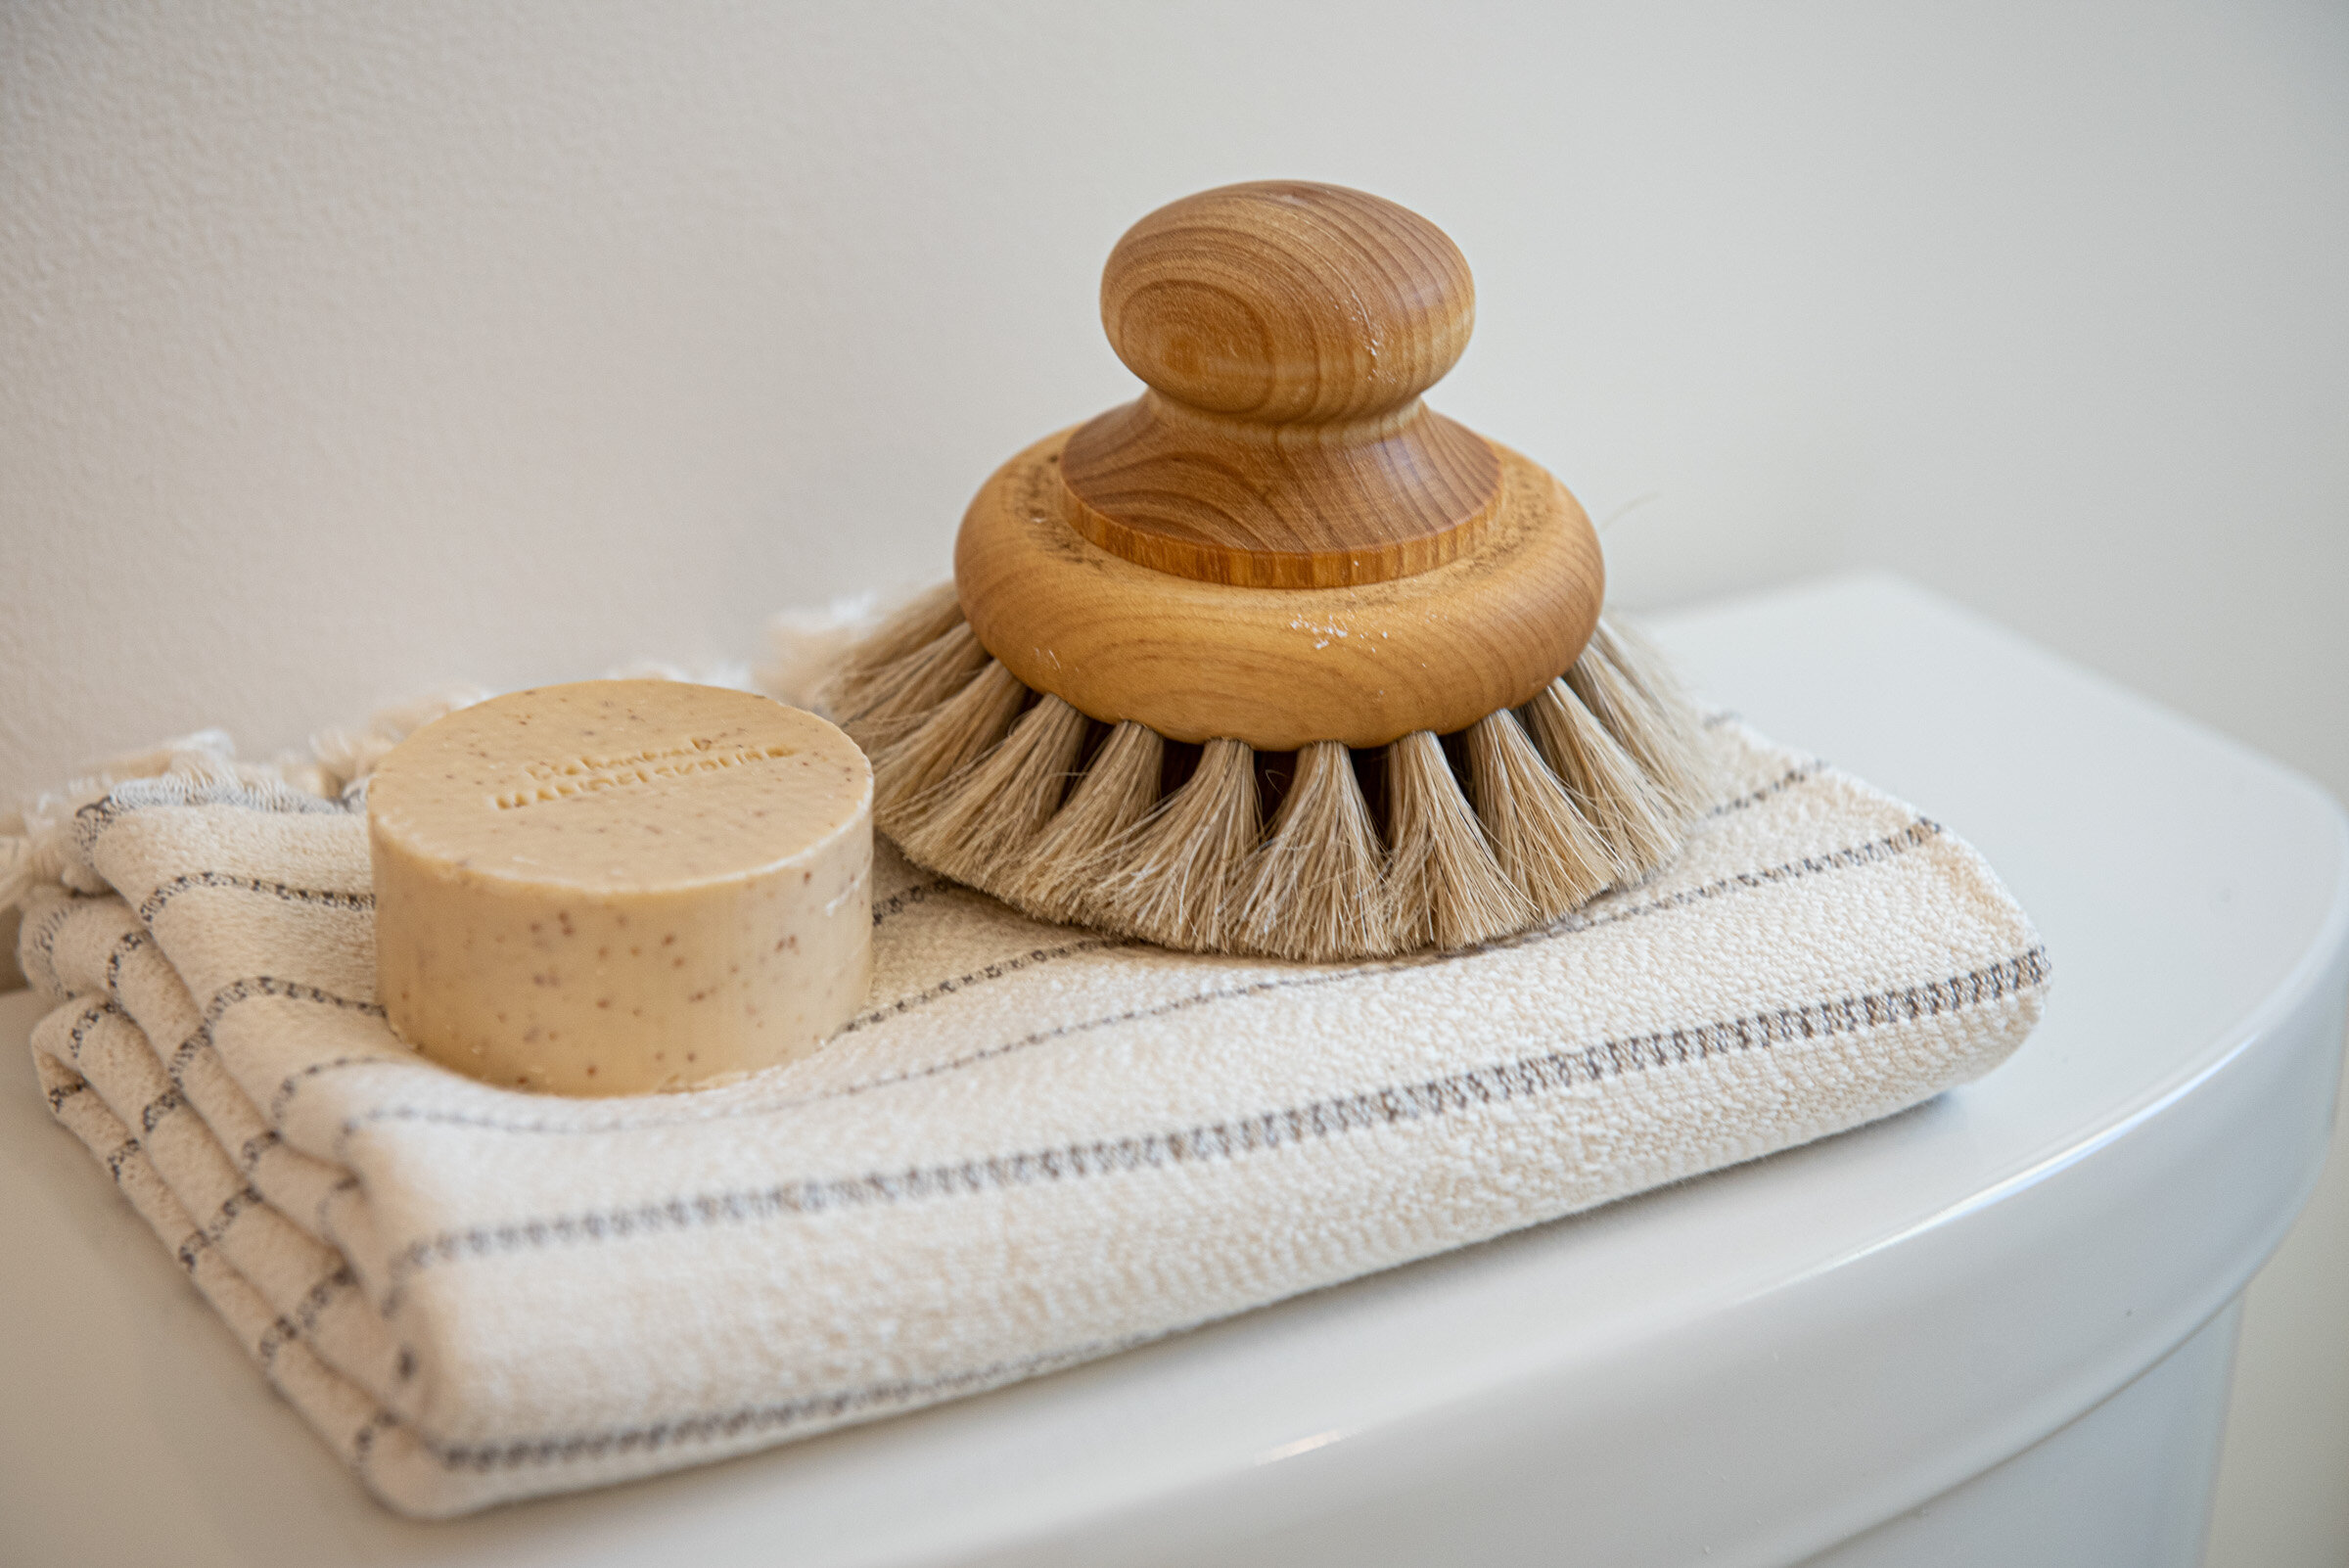
Items (all sourced, delivered and installed by Label C unless otherwise specified): : Wythe King Bed (similar here) // Gold Arch Floor Mirror (similar here) // Cayman Nightstands // Large Ceramic Bedside Lamps // Master Rug // 6 Drawer Dresser // Woven Wooden Blinds In “Mesa” // Bathroom Vanity (Home Depot) // Bathroom Lights (Wayfair) // Brushed Gold Fixtures (Wayfair) // Artwork (Etsy and The Poster Club) // Linen Bedding // Pillows // Candles // Books // Hand Towels // Bathroom Accessories (Label C)
The Guest Bedroom
The Guest Bedroom (or additional kids room) was a good-sized room but didn’t have access to outside. To open this up, we decided to create a door in place of the window to walk out onto a little “smoking patio” (as it’s called).
Thanks to the Label C collection we were able to add a little bit of flair with gorgeous hanging gold and coral pink clay pendants which Cynthia offset against a beautiful rattan bed, fresh white linens and gorgeous vintage pillows. In working with a designer we were able to get the look we wanted whilst still within our budget by going for some premium/feature items (like the pendant lights and bed) and offsetting these with slightly less premium items like the bedside tables and the simple closet doors. The perfect balance on budget and on point interiors!

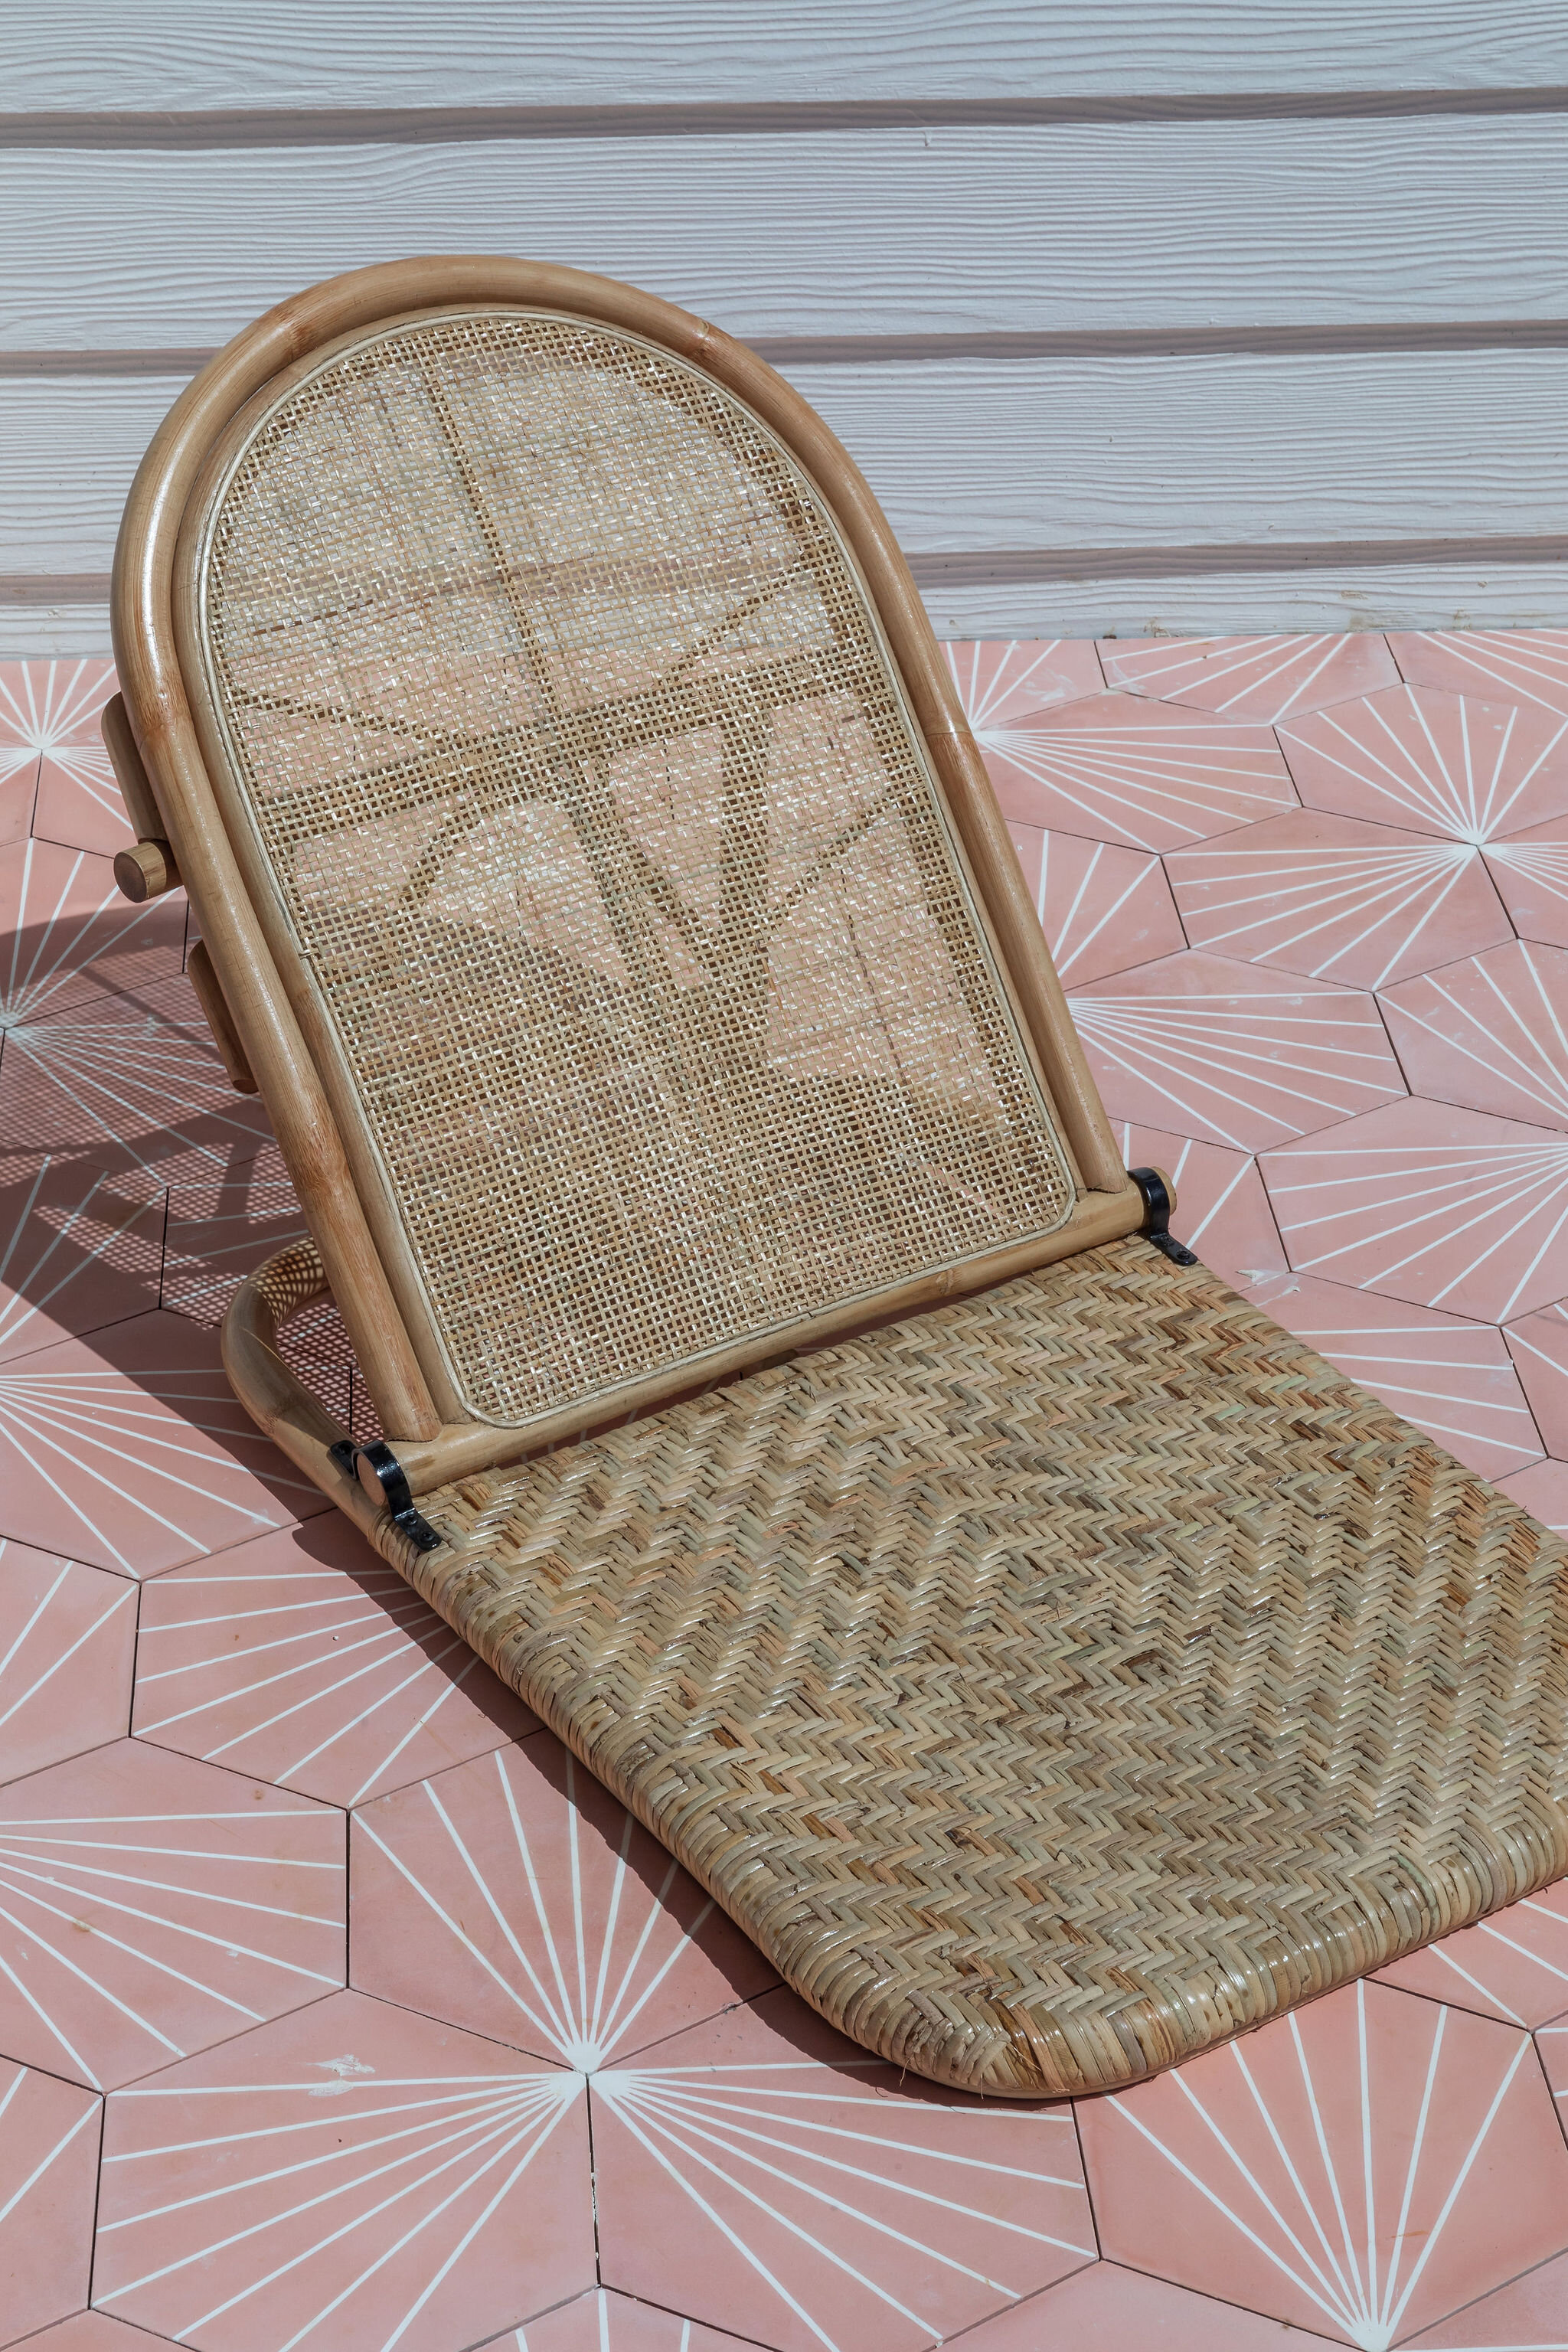
Items (all sourced, delivered and installed by Label C unless otherwise specified): Woven Cane King Bed // Clay Pendant Lights // Souk Wool Rug (West Elm) // Nightstands (Label C) // Seven Mile Beach Chair // Pink Cement Tiles (Wayfair) // Linen Bedding // Pillows // Candles
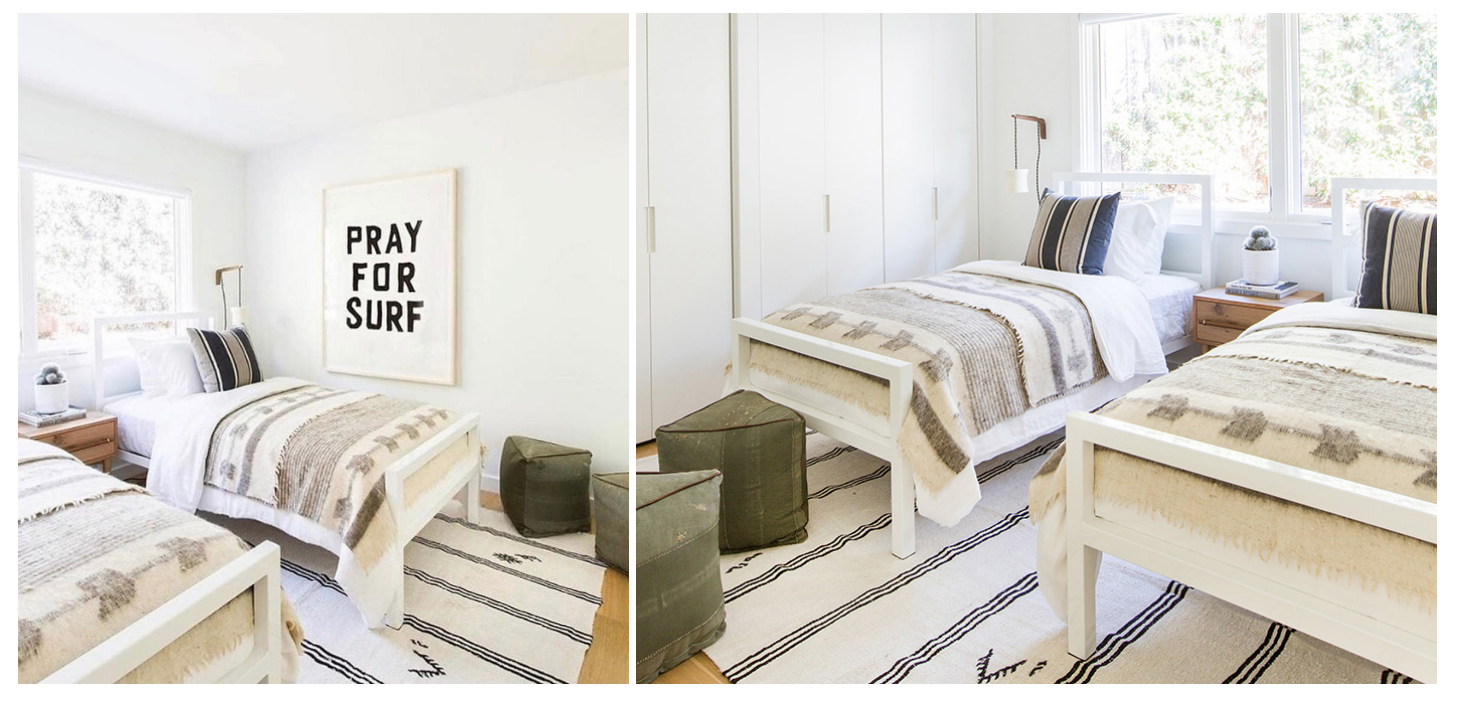
The Kids Bedroom
The “kids” bedroom is probably one of my favourite rooms as it’s just so dam cute (too cute for kids I’d say!). Because this house was built before air conditioning existed (yes you read that correctly) we actually were blessed with too many windows. Windows are expensive to furnish and they can make a room hot with so much sunlight (a phrase only islanders could understand!). So in getting new windows we actually decided to close up the corner window and keep the remaining two windows.
Cynthia designed the most gorgeous twin bedroom which could easily accommodate two adults or a couple (something that is important if we ever get to putting this house on Air BnB!). Given it’s a kids’ room, she selected more durable items that were also budget-friendly so they weren’t too precious for kids to enjoy (cos we all know how kids live). By sourcing prints for us online, we were then able to have them printed locally (via Fine Print) in these beautiful wooden frames she found for us.

Items (all sourced, delivered and installed by Label C unless otherwise specified): Twin Beds (Label C) // Woven Wooden Blinds In “Bonaire Flaxen” // Peppa Poufs // Sweet Dream Sconces // Cora Rug // Sadie Nightstand // All The Stripes Throw Blanket // Floor Baskets Set of 2 // Vintage Pillows // Linen Bedding
The Family Bathroom

Sources: Wall Tiles (same as kitchen (Wayfair) // Floor tiles (Home Depot), Bathroom vanity (Overstock) // Toilet (Amazon) // Faucets and Fixtures (Wayfair) // Light (Wayfair) // Medicine Cabinet & Mirror (Wayfair)
The Laundry
With all my cleaning hacks, the Laundry room is one of the rooms that really makes me want to move in immediately! Here we were lucky to have so much space to work with to create a really useful laundry room. As the main storage area of the house, it was important to have high cupboards too and we worked with Living.ky (who also sourced and installed our Kitchen cabinets) to make sure the space really functioned well. As ever, I can’t help but shout of the fantastic team at ITC tile who helped us pick a durable but stylish countertop that needed to also accommodate a change to our stackable washer & dryer. Note to self, don’t forget the fuse box access!

Sources: Cabinetry (Living.ky) // Hardware (Wayfair), Faucet (Wayfair) // Farmhouse sink (Wayfair) // Samsung Washer & Dryer (Home Depot) // Countertop (ITC) // Flooring (Edie’s) // Dish Soaps and Cleaning Supplies (Label C).
There You Have It
I hope that you found that interesting, inspiring, and helpful for your own renovation projects! It’s definitely not something to take on lightly. But now having done a couple of renos with this one being so major, I can safely say I would do it all over again - even with all the late nights, long weekends spent on-site and all the financial stress. We now have a wonderful family home that we’ve really made our own, ready for entertaining, family fun and cosy evenings in this beautiful space.
The very astute of you may have noticed that I’ve missed off a bedroom (currently unfurnished) as well as the studio apartment or the Mini-Jungalow as I like to call it! I’m going to share the Mini-Jungalow in a separate blogpost to break down how to furnish a smaller space!
Frequently Asked Questions
Why is it called the Jungalow?
The house is a bungalow and when we first saw it the garden was super overgrown and jungle-like. I also love the word and thought it would be a great brand for our one day Air BnB rental and Instagram account!
Where is it?
It’s located on West Bay Road opposite Seven Mile Beach, in a little cul de sac of family houses.
How big is it?
It’s now 5 bedrooms (4 bedrooms on one side and a one-bedroom studio on the other). It was 4 bedrooms when we bought it but we reconfigured the use of space to make a one-bedroom studio (which already existed just a bit larger)
What was your reno budget and did you stick to it?
Every renovation project differs and because we needed to do so much to modernise this home (like installing central air conditioning etc) our budget was quite substantial and over half of what we paid for the house. Once you start a renovation project it’s inevitable that unexpected costs will crop up so try and overbudget and keep a contingency fund for those “little surprises”. Like anything, we had to make decisions on what to prioritize to keep within our budget but I’m pleased to say we were only a little bit over our initial estimates.
What is the Mini-Jungalow?
The mini-jungalow is a one-bedroom studio apartment that is on the side of the main Jungalow and I’ll be sharing its photos in another blog soon!
Why aren’t you moving in?
It has been such a tough decision but in all honesty, we just don’t need the space yet! We do intend on living in it, but for now we are happy in our current home at Vela.
Have more questions? Ask away in the comments below!
The Jungalow Dream team
Contractor Team - Richie Nelson and team
Interior Designer & Furniture Procurement - Cynthia Tranel of Label C Designs
Initial Design Consulting Hours - Katie Adams
Landscaping Design - Francois Sevenster
Landscaping - John Surdeen and his team at Earthworks
Shipping & Freight Forwarding - Maxine and the team at Caribbean Creations
Kitchen & Laundry Cabinetry - Paul, Gary and the team at Living.ky
Stonework (Kitchen and laundry countertops, shower lips) - Joey, Fadi, Natasha at ITC Tile
Main Flooring - Teresa Edie and the team at Edie’s Decor
Closets - Helen Leacock at Custom Closets
Blinds - Blinds.com


ABOUT LABEL C DESIGNS
Label C is a full-service interior design firm inspired globally by minimal purity, complex simplicity, and edginess of the modern world mixed with eclectic vintage design approach. Led by Cynthia Tranel, Label C Designs is available to assist in all aspects of a project from start to finish including consulting with manufacturers and contractors. They’ll transform your space into a functional beautiful interior with furniture, fabrics, accessories and provide you with custom pieces tailor-made for your needs. Label C Designs brings together island luxe with effortless boho-chic vibes, perfect for relaxed family living. Now with an incredible online store, the Label C shop offers an entire home interiors selection that is both on-trend and on budget.
For more information please visit www.labelcdesigns.com


Here are some of the most magical things we learnt from ‘the year that was’ and a healthy reminder of all the good to focus on in 2021.